




Chicago Screws vs Rivets for Belts: How to Choose the Right Fastener
The most permanent fastener isn’t always the best choice for a belt. If you may want to change the buckle or repair the strap later, a rivet can make that job harder. Choosing between Chicago screws vs rivets for belts starts with one question: should this connection stay fixed, or should you be able to undo it?
It’s easy to focus on appearance or assume one option will be more durable. But a good choice also depends on the belt’s layers, how you’ll use it, and whether you have the right tools to install the hardware securely. A loose screw can work free, while a poorly set rivet can compromise the fastening.
In this guide, we’ll compare permanence, adjustability, appearance, and installation so you can match the fastener to your design and intended use. You’ll also learn what to check before you start, including leather thickness, hardware fit, and the tools each option calls for. Whether you’re making a belt from scratch or planning a repair, you’ll be better prepared to choose hardware that suits the way you want to use it.
Key Takeaways
- Choose Chicago screws vs rivets for belts by deciding whether you may need to remove or replace the fastening later.
- Consider how exposed hardware will look as part of the belt design, not just how it joins the layers.
- Use the quick decision matrix to match the fastening method to your belt’s construction, intended use, and experience.
- Before assembly, mark placement, check alignment, and confirm the fastener fits the leather layers.
- Test your chosen method on suitable scrap first, then gather the hardware and tools needed for the finished belt.
Chicago Screws vs Rivets for Belts: What Actually Changes?
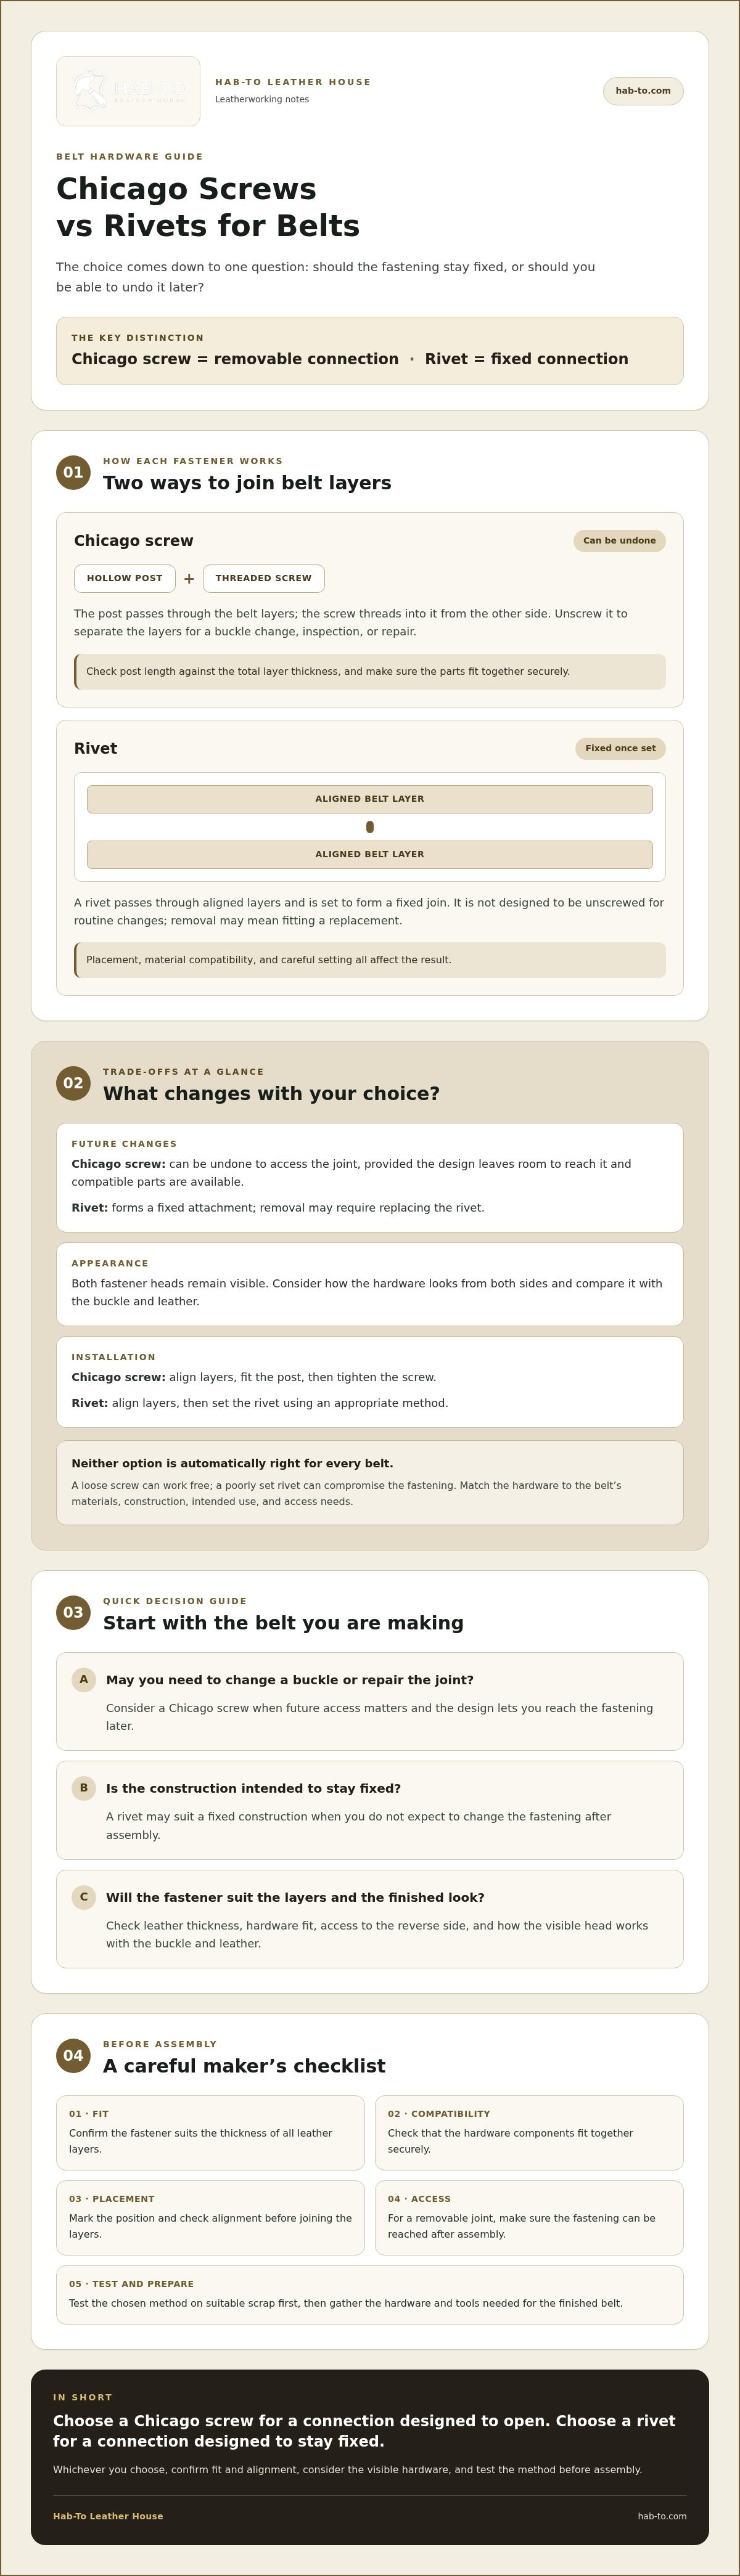
The key difference is whether you want the fastening to come apart. A Chicago screw joins belt layers with a post and a threaded screw, so you can undo it to change a buckle or make a repair. A rivet is set through aligned layers to create a fixed join. Removing one later may mean replacing the fastener.
That difference affects future access, the hardware visible on the belt, and the installation process. In the Chicago screws vs rivets for belts decision, neither option is automatically right for every design. Check the belt materials, construction, and fastener compatibility before committing.
For a closer look at the screw-style fastener, watch this video from Adam Savage’s Tested:
How Chicago screws work on a leather belt
A Chicago screw has two main parts: a hollow post and a screw that threads into it. The post passes through the belt layers, and the screw closes the connection from the other side. This type of fastener is also called a Chicago screw (or sex bolt). Because you can unscrew it, you can separate the layers to change hardware or make a repair. Compare the post length with the total thickness of the layers, and check that the parts fit together securely.
How rivets fasten belt layers
A rivet passes through aligned layers and is set using an appropriate method to form a fixed join. Unlike a screw, it isn’t designed to be unscrewed for routine changes. Removing one may damage the fastener, so plan on fitting a replacement. The result depends on correct placement, compatible materials, and careful setting.
| Consideration | Chicago screw | Rivet |
|---|---|---|
| Future changes | Can be unscrewed for access | Fixed once properly set |
| Visible hardware | Fastener heads remain visible | Rivet heads remain visible |
| Installation | Align layers, fit post, tighten screw | Align layers, then set rivet |
Consider the appearance from both sides of the belt. Either fastener may become a visible design detail, so compare its head with the buckle and leather before choosing. For belt-making material options, explore leather for belts, then confirm that the hardware and tools suit your construction.
Belt Fastener Trade-Offs: Permanence, Adjustability, and Appearance
The practical trade-off is simple: Chicago screws allow disassembly, while a correctly set rivet creates a fixed join. A removable fastening is useful only if the design allows access and you can reuse or replace it with compatible parts. Consider the complete belt construction, not just the fastener in isolation.
| Fastener | Advantages | Trade-offs |
|---|---|---|
| Chicago screw | Can be undone to inspect or change the fastening; useful for designs that need access later. | Requires compatible screw components for reassembly; exposed heads become part of the look. |
| Rivet | Forms a fixed attachment after setting; suits a design that isn’t intended to come apart. | Removal may require replacing the rivet; visible heads affect the finished appearance. |
When future adjustment or repair matters
Think about possible changes before assembly. You may want to open the joint to inspect the layers, reposition hardware, or replace a component. With screws, check that the post and screw will remain compatible if you need to reassemble the belt. Also consider whether you can reach the reverse side after assembly. If the design blocks access, the benefit of a removable joint may be limited.
A repairable joint is useful when the construction supports it and suitable replacement parts are available. For example, a belt designed around a removable fastening needs to leave a way to reach and secure that fastening later. If you’re still choosing the strap material, browse leather for belts with the planned hardware and construction in mind.
When a fixed belt construction is the priority
If you don’t expect to change the fastening after assembly, a rivet may suit a fixed construction. Setting it correctly matters, and removing it later may mean fitting a new one. A screw head and a rivet head can both remain visible, so consider their shape and finish alongside the buckle and leather. The hardware can be a deliberate design feature or something you want to keep visually restrained.
Neither fastener guarantees a particular level of durability on its own. Results depend on suitable sizing, compatible materials, and careful workmanship. In short, screws offer a removable connection for service or changes, while rivets create a fixed connection after setting.
As you plan the project, explore leathercraft bundles for supplies that may suit your needs. Check each bundle’s contents before choosing tools or materials.
Which Fastener Fits Your Belt Design and Use?
Start with the belt’s intended use, then check whether the construction supports your choice. Will you need to change or inspect the hardware after assembly? Can the fastener pass through the combined layers and still fit correctly? Answering these questions can help you choose before you cut holes or set hardware.
Use this quick decision matrix to compare serviceability, appearance, and your comfort with the installation process:
- Future access: If you expect to change a buckle or open the joint for repair, consider a Chicago screw, provided the design leaves access to both sides.
- Fixed construction: If the fastening isn’t meant to come apart, a rivet may suit the design, as long as its type and size match the layers being joined.
- Finished appearance: Decide whether the exposed screw or rivet head complements the buckle and leather. Both can be visible design details.
- Maker experience: Choose a method you can assemble carefully with the tools and instructions available to you. Test it on suitable scrap before working on the finished belt.
Material choice matters, too. Leather thickness and the number of layers affect whether a fastener can pass through and fit as intended. Explore leather for belts and consider your planned construction as you select material and hardware.
Choose Chicago screws when a belt needs serviceability
A screw-based fastening is worth considering if you value disassembly or expect to change a component later. Before buying, compare the post length with the full thickness of the material layers. The parts need to fit together correctly. Check that the reverse side remains accessible for assembly and future changes. As part of normal belt care, inspect the screw connection and check that it remains secure.
Serviceability also depends on having compatible components when it’s time to reassemble the belt. A removable joint won’t help much if replacement parts don’t fit the original construction. Plan for access and compatibility from the start.
Choose rivets when the design calls for a fixed joint
If you intend the belt to stay assembled, a rivet may be the more suitable choice. Match the rivet type and size to the materials and layers being joined, and follow the appropriate setting method. The visible head affects the finished look, so consider its position and appearance alongside the buckle.
Your choice isn’t a shortcut to guaranteed durability. With either method, fit, material compatibility, and careful workmanship matter. Pick the fastener that suits the design you’re building, not just the one that seems simplest before assembly.
Fitting Belt Screws or Rivets: A Careful Maker's Checklist
A sound fastening starts before installation. Gather the right materials and tools, mark carefully, and test your method on suitable scrap. A test gives you a chance to catch a misplaced hole or poor fit before it affects the finished belt.
What you will need
- Leather for belts, or suitable scrap with comparable layers for a test assembly.
- The fastening hardware selected for your design. Check the product details and instructions for fit and installation requirements.
- For rivets, a suitable setter and any other tools specified for that rivet. Review this rivet-setting tool kit and confirm compatibility before use.
- Marking and hole-making tools appropriate to your hardware and the instructions provided with it.
Prepare and align the belt layers
Mark the fastening position consistently, then check both sides before making holes. Bring the layers together as they’ll sit in the finished belt and confirm that the marks line up. Verify the required hole size and placement against the chosen hardware’s instructions. Use suitable scrap or a sample with comparable layers to check alignment and practise assembly before working on the finished belt.
Install, inspect, and maintain the fastening
Follow the hardware’s instructions and use tools suited to that fastener. Work steadily, keeping the layers aligned as you secure the joint. After assembly, check that the fastener appears seated as intended and that the layers remain aligned. A visual inspection may reveal an obvious issue, but it doesn’t establish a load rating or guarantee performance.
For screws, consult the product guidance before retightening or making adjustments. For rivets, follow the specified setting method rather than trying to correct a poor result by force. Careful preparation protects the work, and careful installation finishes it.
Make Your Final Choice and Gather the Right Belt-Making Supplies
Choose a removable construction if you value access for future changes or repairs. Choose a fixed join if you intend the belt to stay assembled. Either way, confirm that the hardware fits the belt’s material layers and test your method on suitable scrap before assembling the finished piece.
Use a final checklist before buying
- Confirm the design: Decide whether the fastening should be removable or fixed, and consider how its visible head will look with the buckle and leather.
- Measure the material layers: Account for every layer the fastener must pass through, then compare the total thickness with the fastener’s product details.
- Check tools and instructions: Confirm that the hardware suits your construction and that you have appropriate installation tools.
- Test before finishing: If the method is new to you, make a small test assembly using suitable scrap.
Supplies to consider
- Leather for belts, selected with your planned construction in mind.
- Leather hardware and leatherworking tools that match the fastening method and material layers.
- Crafting bundles as a way to gather project supplies. Check each bundle’s contents; don’t assume it includes specific screws or rivets.
Hab-To Leather House offers vegetable-tanned leather, hardware, and leatherworking tools. If you’d like guidance choosing materials or tools, you can book a free one-on-one video consultation with Mike.
Related reads:
- Solid Brass Hardware: The Artisan’s Guide to Quality Leathercraft
- A Crafter’s Guide to Essential Leather Hardware
Choose Your Fastener and Get Your Belt Project Moving
The choice between Chicago screws vs rivets for belts comes down to the connection your design needs. Choose screws if you want a joint you can open for changes or repairs, and rivets if you intend the fastening to stay fixed. In either case, confirm that the hardware fits the belt’s material layers, then test your method on scrap before assembling the finished piece.
Good preparation makes for better work. Hab-To Leather House offers vegetable-tanned leather, leather hardware, and leathercraft tools, with no minimum order requirements for makers. If you’d like a second opinion on choosing materials or tools, Mike is available for a free one-on-one video consultation.
Take your time checking the fit and alignment, then enjoy bringing your belt design to life.
Frequently Asked Questions
Are Chicago screws or rivets better for a leather belt?
Neither is universally better; choose based on whether you want a removable or fixed connection. Chicago screws can be taken apart for a buckle change or repair, while a properly set rivet creates a fixed join. For Chicago screws vs rivets for belts, consider the belt’s layers, access to the hardware, appearance, and intended use. In either case, check that the fastener suits the construction and follow its installation instructions.
Can Chicago screws come loose on a belt?
Yes, a Chicago screw can loosen, so don’t assume it will stay secure without inspection. Assemble it according to the fastener’s instructions, and check the connection during normal belt care. If it needs attention, follow the product guidance for tightening rather than applying an unverified method or product. Confirm that the post and screw fit the belt layers correctly, since compatible parts and careful assembly are central to a sound fastening.
Can you replace rivets on a leather belt?
Yes, a rivet can usually be removed and replaced, but removal may damage the rivet and can mark or harm the leather if done carelessly. Work slowly and choose a removal method suited to the rivet and belt construction. Once removed, inspect the leather and the original hole before fitting a replacement. The new rivet must suit the material layers and be set using the appropriate instructions and tools.
Which is easier for a beginner to install, Chicago screws or rivets?
Chicago screws are often more straightforward for a beginner because assembly typically involves fitting the post and tightening the screw with a suitable screwdriver. Rivets require correct alignment and setting with an appropriate setter and mallet or press. Either method takes care. Read the hardware instructions, check that the parts fit your belt layers, and practise on suitable scrap before working on the finished belt.
How do I choose the right fastener size for a leather belt?
Measure the full thickness of the layers the fastener must join, then compare that measurement with the fastener’s specifications. For a Chicago screw, check that the post length suits the material stack and that the components are compatible. For a rivet, follow the maker’s guidance on matching its size to the construction. Check hole-size requirements, too. Don’t guess from the belt’s appearance; verify product details before buying or punching holes.
Can I use Chicago screws and rivets on the same belt?
Yes, you can use both on one belt if each fastening suits its role and fits the material layers at that location. For example, you might choose a removable connection where you expect a hardware change and a rivet for a separate fixed join. Consider how the different fastener heads look together. Check the fit and installation requirements for each, and test the arrangement on scrap before assembling the belt.
What tools do I need to set rivets in a leather belt?
You’ll generally need a rivet setter suited to the rivet and a mallet or press appropriate to the setting method. Depending on the hardware instructions, you may also need a tool to make the correctly sized hole. Tool compatibility matters, so check the rivet and tool details before starting. Practise on suitable scrap, keep the layers aligned, and follow the manufacturer’s setting guidance rather than striking or pressing by guesswork.
Disclaimer
All our blog articles are made for information purposes only we dont take responsability for any content from third parties.