

How to Build a Leather Tote Bag with the Right Materials
The leather you choose can make or break a tote, so start with flexible 4 to 5 oz. vegetable-tanned leather. To learn how to build a leather tote bag, pair it with sturdy straps, suitable tools, and a pattern you can test before cutting. The right materials make each step more manageable.
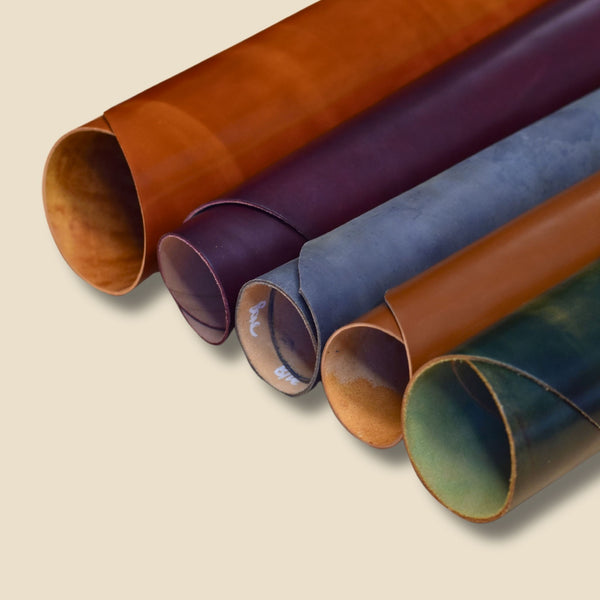
Vegetable-tanned leather is a strong choice for a tote with character. It can darken with use, develop a unique patina, and readily accept dyes and paints. Weight and flexibility matter, especially when sewing seams and shaping the bag. Stiffer leather can work, but some parts of the project may take more effort.
This guide walks you through choosing the leather, making reinforced straps, gathering tools, and using a free PDF tote bag pattern. You’ll also learn why a paper or cardboard template and a quick machine test can help you prepare before cutting into your leather. Make thoughtful choices at the start, and the build becomes clearer from the first cut to the final stitch.
Key Takeaways
- Choose leather for the job: the bag body needs flexibility, while straps benefit from a sturdier build.
- Plan reinforced straps around the pattern’s finished dimensions, then account for the extra leather needed to fold and layer them.
- Gather cutting, measuring, hole-punching, and sewing tools before starting so each step is ready to go.
- Use a paper or cardboard pattern to check the layout and make better use of the hide before cutting.
- Estimate leather needs from the pattern pieces and how they fit on the hide, allowing for offcuts and the direction of the leather.
Leatherworking materials and tools
- What you will need: Gather flexible leather, thread, hardware, cutting tools, a ruler, and sewing supplies. Compare leather for bag projects with your pattern, and choose suitable leatherworking tools and leather hardware. The total cost depends on your material choices and which tools you already own.
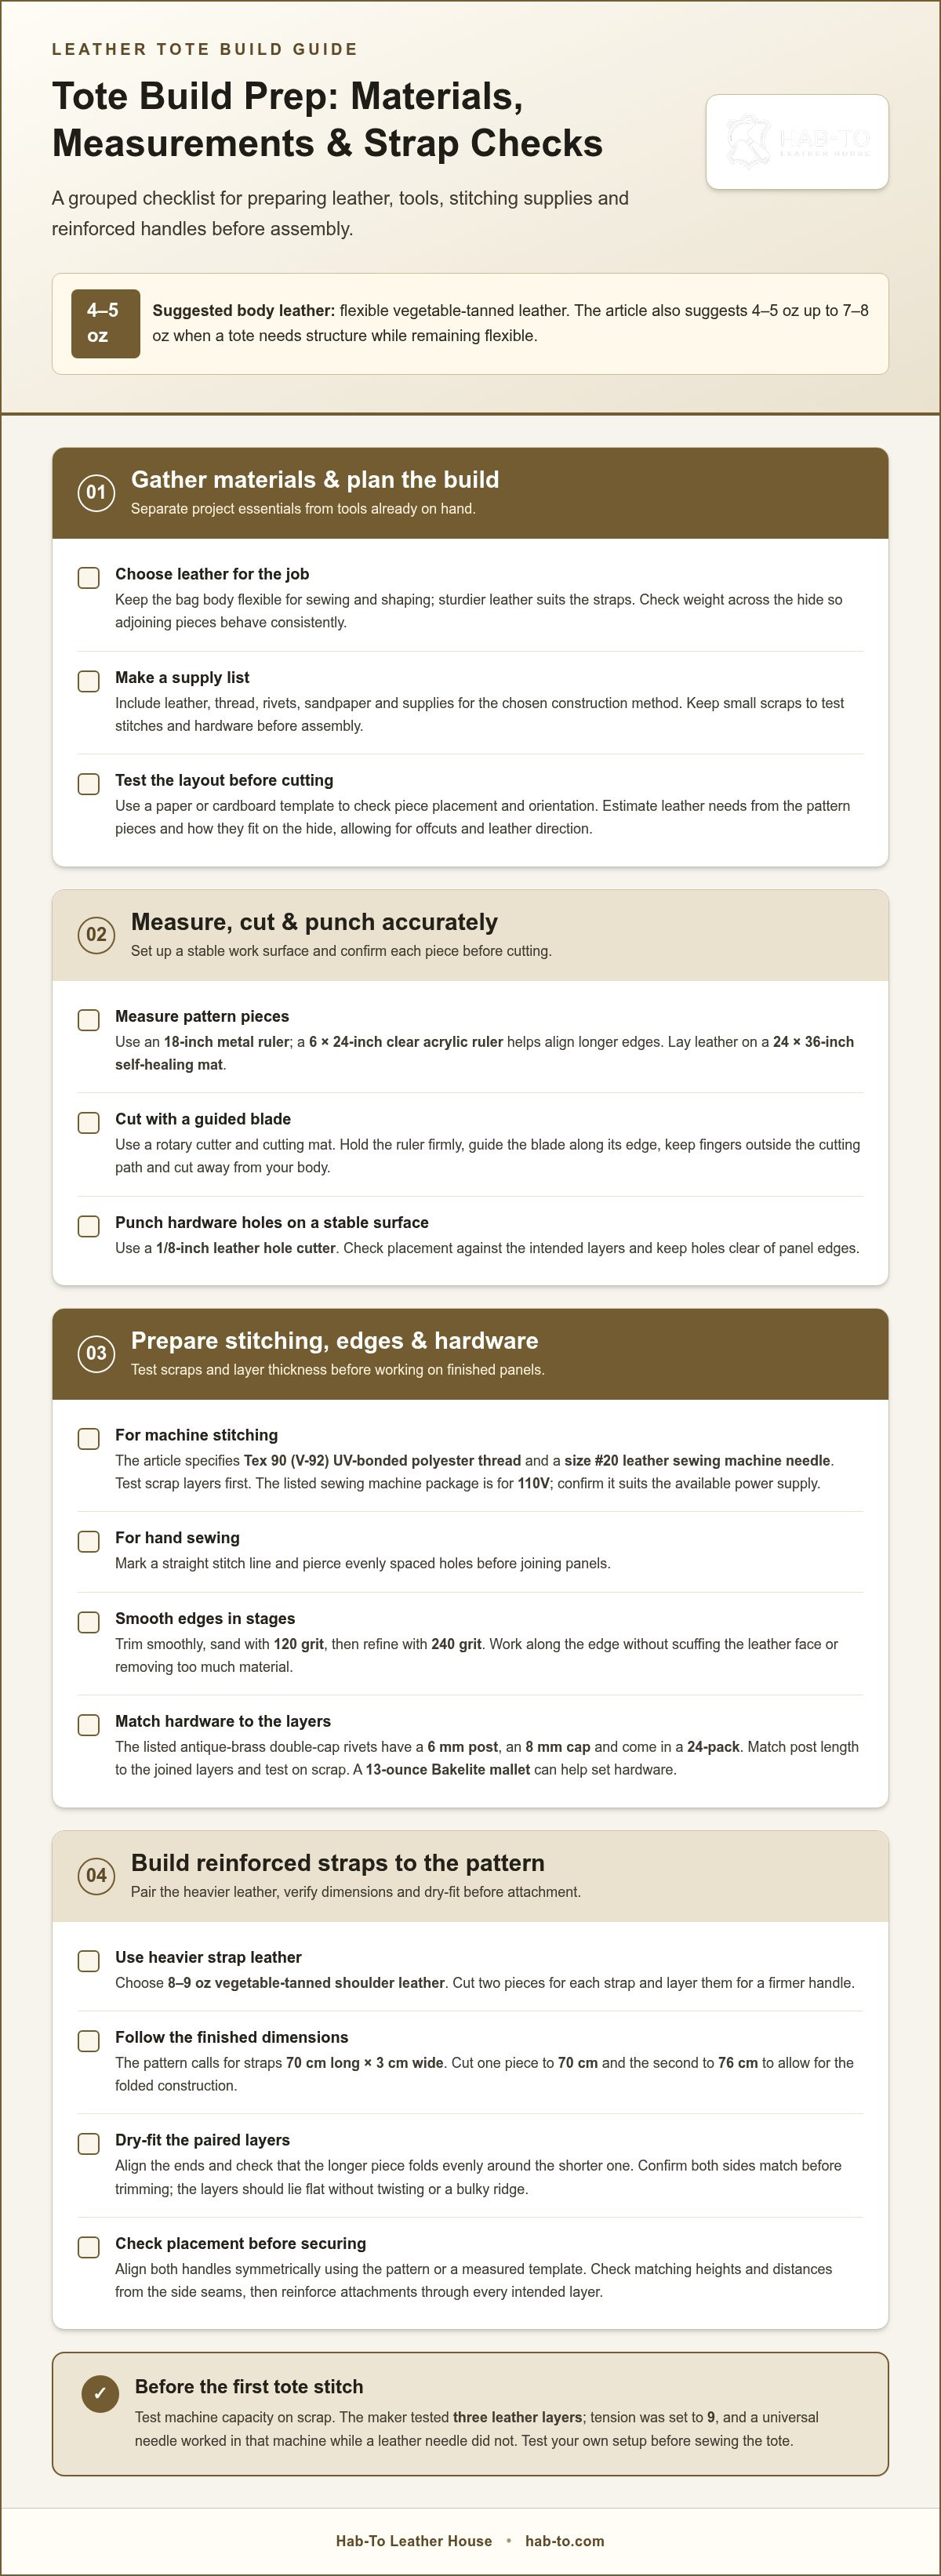
- Make a supply list before you buy. Include leather, thread, rivets, sandpaper, and the tools required for your chosen construction method. This separates essentials from tools you already own. Keep small scraps for testing stitches and hardware before assembly.
- Measure pattern pieces with an 18-inch metal ruler. A 6-inch by 24-inch clear acrylic ruler helps align longer edges. Lay the leather on a 24-inch by 36-inch self-healing mat before marking. Confirm each piece’s position and orientation before cutting.
- Cut accurately with a rotary cutter and cutting mat. Hold the ruler firmly, then guide the blade along its edge. Keep fingers outside the cutting path, and cut away from your body. For hardware holes, use a 1/8-inch leather hole cutter on a stable surface.
- Prepare sewing supplies for your chosen method. Machine stitching uses Tex 90 (V-92) UV-bonded polyester thread and a size #20 leather sewing machine needle. Test scrap layers first. For hand sewing, mark a straight stitch line and pierce evenly spaced holes before joining panels.
- Finish edges after trimming them smoothly. Sand with 120 grit, then refine with 240 grit. Work carefully along the edge without scuffing the leather face. To reinforce stress points, position hardware through the intended layers and keep holes clear of panel edges.
- Test machine capacity before stitching bulky seams. The maker tested a piece made of three layers of leather. Machine tension was set to 9 for even stitches, and a universal needle worked in that machine while a leather needle did not. A scrap test helps identify issues before sewing the tote.
- Prevent common mistakes by checking alignment before cutting or stitching. If a cut drifts, compare it with the pattern before trimming further. Secure the material and ruler, and keep hands clear of blades and needles. A 13-ounce Bakelite mallet can help set hardware; test the setting process on scrap first.
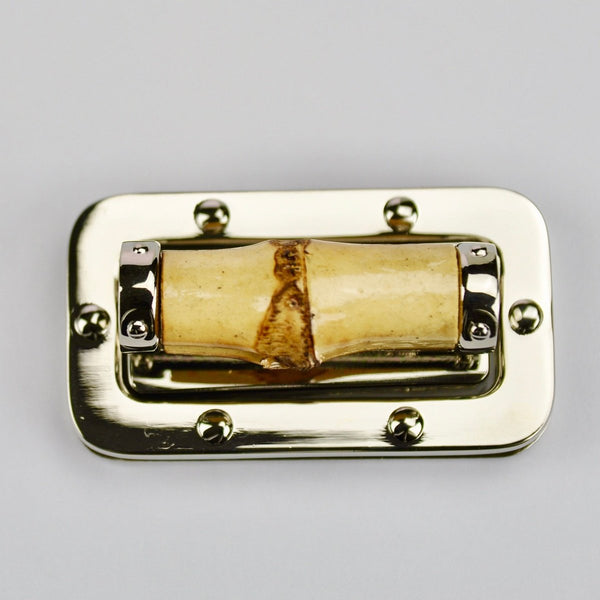
For a tote that needs structure while remaining flexible, the suggested leather weight is 4-5 oz up to 7-8. Check the weight across the hide so adjoining pieces behave consistently, and use offcuts to confirm that the leather folds and stitches as expected. The listed antique-brass double-cap rivets have a 6mm post length and an 8mm cap, and are sold in a 24-pack. Match the post length to the layers being joined, and test a rivet on scrap before setting hardware on a finished panel.
The listed sewing machine package is for 110V, so confirm that it suits the available power supply before use. For edge preparation, the listed sandpaper grits are 120 grit and 240 grit. Begin with the coarser grit to smooth trimmed edges, then use the finer grit to refine them. Keep sanding pressure even, and check the edge as you work to avoid removing too much material or marking the leather face. These checks help ensure that the chosen supplies suit the leather and construction method.
Strap leather recommendations
- Choose 8-9 oz vegetable-tanned shoulder leather for the straps. This heavier leather gives each handle a firmer feel than the bag body. Cut two pieces for each strap, then layer them together. The paired construction adds strength and keeps the handle from feeling like one thin strip. Check the leather for marks before laying out your cuts.
- Set the finished strap dimensions before cutting. The pattern calls for straps 70 cm long and 3 cm wide. Measure each piece against a ruler, marking both long edges clearly. Keep the width consistent from end to end. A gradual taper or uneven edge can make the handles sit differently on the bag.
- Cut the first leather piece for each strap to 70 cm. Cut the second piece to 76 cm, allowing extra length for the folded construction. Keep the pieces paired by strap, so you can assemble matching layers. Mark the intended finished length and fold positions on the underside, not the visible face.
- Dry-fit each pair of strap layers before stitching or attaching hardware. Align the ends and check that the longer piece folds evenly around the shorter one. Trim only after confirming both sides match. The added layer should lie flat, without twisting or forming a bulky ridge along the handle.
- Join the layers with an even stitch line, parallel to the strap edges and not too close to them. If using a sewing machine, test the layered leather on scrap first. For hand stitching, mark the line before punching holes so both straps have matching spacing and direction.
- Position the straps on the tote before attaching them. Use the pattern or a measured template to align each handle symmetrically. Check that both ends sit at matching heights and distances from the side seams. Pin or temporarily clamp the straps, then inspect the layout from the front and back.
- Reinforce each strap attachment with secure stitching or suitable hardware. Keep the attachment area flat, and check that rivets or stitches pass through every intended layer. Avoid placing holes too close to the leather edges. Test hardware placement on stacked scraps first, especially where the bag panel and layered strap meet.
- Inspect the finished handles before carrying the tote. Compare both straps for length, width, edge alignment, and attachment position. If one handle twists, correct it before final attachment rather than forcing it into place. A leathercraft bundle can help bring related project materials together.
Choosing vegetable-tanned leather
- First decide how you want the tote to feel and hold its shape. A softly draping bag behaves differently from a firm, upright design. Consider what you plan to carry and the look you want, then gently bend leather samples to compare them. Handling the material gives you a better basis for choosing than appearance alone.
- Check how the leather responds at folds and seams. Bend a sample to match the pattern without forcing a sharp crease. Firm vegetable-tanned leather can work, but shaping and stitching may take more effort. When planning how to build a leather tote bag, consider these handling differences before cutting.
- Inspect the grain and visible surface before assigning pattern pieces. Place the front template over the area you want to feature, then arrange the back and smaller sections around natural marks or variations. This lets you decide whether the finished tote should look uniform or show more of the hide’s individual character.
- Consider how the surface will age. Vegetable-tanned leather darkens with use and develops a unique patina over time. Decide whether you want that change to stand out or blend into the design. If you want to preserve the leather’s initial appearance, handle it carefully during construction.
- Decide whether to leave the surface natural or add color. Vegetable-tanned leather readily accepts leather dyes and paints. Test your chosen finish on an offcut from the same hide before treating a visible panel. Compare the dried sample with your intended color, then adjust your approach before finishing the tote pieces.
- Match the hide’s character to the tote design. A simple bag leaves broad areas exposed, making grain and surface variations more noticeable. A design with seams or separate panels creates more visual breaks. When browsing leather for bags, consider how the material’s appearance will work with your pattern.
- Arrange the full-size pattern before settling on the layout. Turn the paper pieces to compare grain direction and surface character. Mark the visible face of each panel, then review the arrangement as a whole. Reposition a template if a natural mark falls in a prominent area.
- Make a sample seam from an offcut. Fold it as the tote seam will fold, then test your planned stitching method. Notice whether the leather bends readily or resists the shape, and use that observation to prepare for assembly. As you learn how to build a leather tote bag, these small tests can guide your material choices.
- Let the leather guide how you handle it. If it feels firm, take extra care when positioning and shaping the pattern pieces. Keep a test scrap beside your work for reference. Seeing how the hide responds helps you make adjustments before assembling the main pieces.
Free PDF tote bag pattern
- Start with the free basic leather tote bag pattern PDF. Its file size is 1.74 MB. Save the complete file, then open it in a PDF reader. Check each page for missing outlines, marks, or clipped edges before printing. A quick page review can catch file or display issues before they affect your templates.
- Print the pattern at its intended scale. Turn off automatic fit-to-page settings, which can resize the pieces. If the design spans tiled pages, match the alignment marks carefully. Join the sheets flat and inspect the outlines where they meet. Misaligned joins can distort the shapes you trace.
- Make a sturdy paper or cardboard pattern from the measurements. This is the maker’s recommended preparation before cutting leather. Trace each piece onto firm material, label it, and cut cleanly along the outline. A reusable template is easier to position repeatedly than thin printer paper.
- Compare your template pieces with the printed pattern. Align corresponding edges and check that the parts meet as intended. Clearly label the front, back, sides, base, and straps. Mark each piece’s visible face and orientation too, to prevent mirrored pieces or misplaced cutouts during layout.
- Make a quick mock-up from scrap cotton to test the tote’s proportions. This helps you check the dimensions before cutting leather. Assemble the fabric pieces in the planned order, then inspect the opening, depth, and overall shape. If the sample feels wrong, adjust the paper template first.
- Study the side cutouts carefully before transferring them. They allow the tote to form a square bottom without added bulk. Check that the left and right cutouts match, then mark their positions clearly on the template. Consistent placement helps the bottom take shape evenly during assembly.
- Lay out all the template pieces together before tracing. Check that they fit your planned material layout and identify any piece that needs repositioning. Group the pieces by assembly stage. Clear organization makes it easier to move from tracing to cutting without confusing similar shapes.
- Keep the original PDF for personal reference. Do not redistribute the template in any form. Store it separately from altered paper pieces, and write personal adjustments on the physical template. This keeps the source file intact while preserving project notes for your next build.
How much leather is needed to make a standard-size tote bag?
- Use the finished pattern pieces to estimate how much leather you need. “Standard size” does not specify one fixed amount because tote dimensions and construction vary. The front, back, base, sides, pockets, and straps determine the total. List each piece before estimating the material required.
- Measure every pattern piece and note its widest and longest points. Include gussets, cutouts, and any separate base panel. Add straps and interior pieces if they use the same hide. This inventory shows which shapes need to fit together and which may require separate leather.
- Make full-size paper or cardboard templates from the pattern. Arrange them on a drawing of the hide, keeping each piece within its usable outline. This is more reliable than simply adding the pieces’ areas, because irregular hide shapes and grain direction affect what will fit.
- Allow for seams and folded construction in your layout. A panel needs enough material for its seam allowance, while a folded edge uses leather beyond the visible finished dimensions. Mark these allowances on the templates before planning the cut, so the layout reflects the actual pieces.
- Place the largest panels first. Position the tote front and back on the broadest, most usable sections, then fit smaller side pieces around them. Check the hide’s natural edges and surface marks before settling on the arrangement. Moving one large template can change the space available for every smaller piece.
- Plan the straps separately if their leather differs from the bag body. The tote pattern specifies straps 70 cm long, and each strap uses two cut pieces. Include both layers in your layout rather than assuming the body-panel estimate covers them.
- Account for leather flaws and grain direction before cutting. When the layout allows, avoid placing visible marks on prominent panels. Keep matching pieces oriented consistently, and do not rely on narrow gaps between templates unless you can cut them safely and accurately.
- Test the complete layout with paper shapes before cutting the hide. If everything fits, trace each piece and mark its name, visible face, and orientation. If it does not, revise the arrangement or choose a hide that fits the required pieces. This gives you a project-specific estimate instead of relying on a vague standard size.
Explore leathercraft bundles
The free basic leather tote bag pattern PDF is 1.74 MB, offering a downloadable reference for checking the pieces before planning the hide.
Hab-To Leather House: Vegetable Tanned Leather
Hab-To Leather House supplies vegetable-tanned leather, hardware, and leatherworking tools for tote makers. Once your pattern and material needs are clear, explore the leather selection for bags and compare options for the tote body. Choosing leather alongside suitable hardware and tools can make planning your build more straightforward.
When you’re ready to move from templates to cutting and assembly, browse the materials and tools for your project. Crafting bundles bring related supplies together. Choose according to your pattern, construction method, and desired finish.
Explore leather and supplies for your tote at Hab-To Leather House.
Make Your First Cut with Confidence
Shape your tote around your own choices. Before cutting, review the pattern layout and decide which details you want to personalize. A distinctive finish, thoughtful placement, or carefully chosen hardware can give the finished bag a personal touch.
Learning how to build a leather tote bag also develops skills you can use in future projects. Keep your pattern and notes together, and record any adjustments that helped during assembly. Those notes give you a useful starting point for your next leather project.
Hab-To Leather House brings together vegetable-tanned leather, leather hardware, and leatherworking tools for makers planning a project. Explore the crafting bundles to find materials suited to your next steps.
Take your time with the first cut, trust your preparation, and enjoy making something by hand.
Frequently Asked Questions
What tools and materials are needed to make a leather tote bag?
You’ll need leather, thread, hardware, cutting and measuring tools, and suitable stitching equipment. Match your setup to the construction method: hand stitching needs needles and a way to mark and pierce stitch holes, while machine sewing needs a machine that can handle layered leather. Keep scraps nearby to test cuts, stitches, and hardware placement before working on the bag panels.
What type and thickness of leather is best for a tote bag?
Flexible vegetable-tanned leather at 4 to 5 oz. suits the tote’s main panels. Choose the hide by how it behaves when folded and sewn, not just by its appearance. If you’re deciding between two pieces, test a fold and seam on scraps from each. A firm, rigid hide can work, but it can make shaping and assembly more difficult.
What are the dimensions and pattern pieces for a basic leather tote bag?
A basic tote pattern gives the measurements for its panels, sides, cutouts, and handles; there is no universal set of standard dimensions. Use the pattern’s measurements rather than assuming another tote’s proportions will suit your needs. Before cutting leather, assemble a scrap-fabric mock-up and check the opening, depth, and overall shape. Adjust the paper template if the mock-up does not suit your intended use.
How do you make and attach leather tote bag handles?
Make each handle from two layers of 8-9 oz vegetable-tanned shoulder leather, then align and join the layers. The pattern’s straps are designed to be 70 cm long and 3 cm wide. Before attaching them, place the bag flat and compare handle positions on both sides. Check that the handles sit evenly and don’t twist, then stitch or set suitable hardware through the intended layers.
Disclaimer
All our blog articles are made for information purposes only we dont take responsability for any content from third parties.