
Choosing Leather for Your Product Line: A Practical Guide
What if the leather that looks best on its own is the wrong choice for your product line? A striking sample can catch your eye, but thickness, feel, finish, and consistency matter just as much once that leather becomes a bag, watch strap, or other product. Knowing how to choose leather for your product line means looking beyond a single attractive hide.
If you’re unsure how to balance a material’s character with the way your products will be used, you’re not alone. The right choice needs to suit the product, meet your customers’ expectations, and support repeatable production. A cohesive range doesn’t have to rely on one leather everywhere. It needs a considered palette, with each material earning its place.
This guide offers a practical framework for evaluating leather against your product requirements and brand character. We’ll look at use, thickness, feel, finish, and how to test materials at a manageable scale before building them into a range. With a clear process, you can make confident choices that are distinctive, useful, and easier to repeat.
Key Takeaways
- Start with each product’s use and construction needs, then define the look and feel your range should share.
- Learn how to choose leather for your product line by comparing thickness alongside temper, grain, surface, and finish.
- Match material choices to product roles, weighing the desired appearance and feel against practical trade-offs.
- Use a consistent sample-testing process to compare colour, surface, feel, and thickness before prototyping.
- Plan sourcing around small cuts, panels, or shoulders so you can test materials before committing them to a wider range.
How to Choose Leather for Your Product Line: Start with the Product
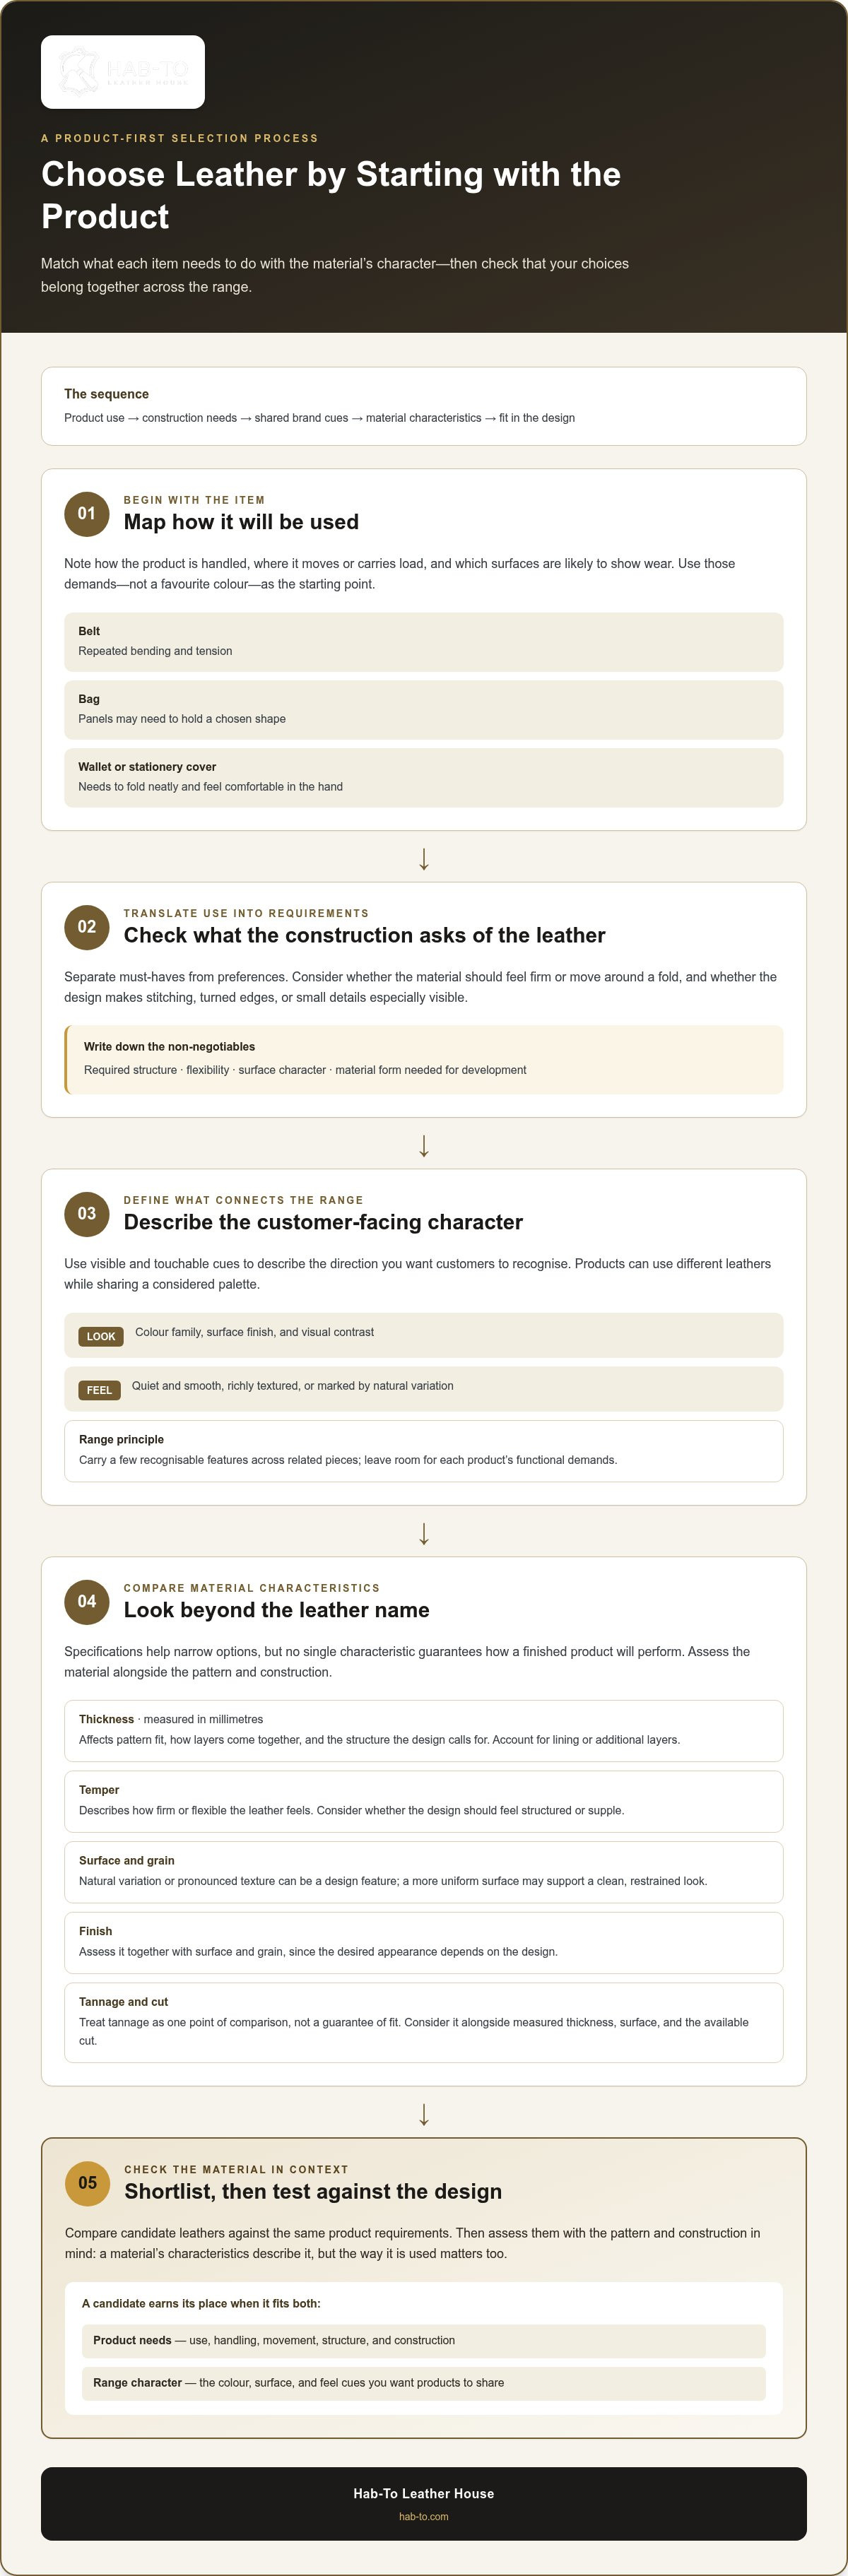
Choosing leather for several products can feel like solving different problems at once. A bag, belt, and small accessory may need different levels of structure, movement, and visual detail, yet still need to feel like they belong to the same range. Rather than choosing the most striking hide first, start with what each product must do, then build a material palette around those needs.
In practice, the product’s use should guide material selection. Product-line selection means matching leather to use, construction, appearance, and sourcing needs, then checking that your choices work together across the collection. If you’re learning how to choose leather for your product line, separate must-haves from preferences before comparing materials.
This video offers a useful introduction to common leatherworking mistakes and material choices:
What should the leather do in the finished product?
Map how the item will be handled and assembled. A belt experiences repeated bending and tension; a bag may need panels that hold a chosen shape; a wallet or stationery cover needs to fold neatly and feel comfortable in the hand. Note contact points, areas that move or carry load, and surfaces likely to show wear. These are design requirements, not details to leave until after you’ve picked a favourite colour.
Then decide what the construction asks of the material. Does a panel need to feel firm, or should it move easily around a fold? Will stitching, turned edges, or small details make the surface especially visible? Explore leather for bags in relation to your pattern and construction, rather than assuming one material will suit every bag design.
Learn the basic terms and processes with What is Leather? as you build a shared vocabulary for comparing materials. For broader planning, write down the non-negotiables first: required structure, flexibility, surface character, and the form in which you can source material for development.
What should customers recognise across the range?
Brand character becomes easier to direct when you describe it in visible, touchable terms. Is the range quiet and smooth, richly textured, or marked by natural variation? Name the colour family, surface finish, and level of visual contrast you want customers to recognise. These are clearer guides than a broad label such as “premium” or “heritage.”
Not every product needs identical leather. Instead, choose a few features to carry across related pieces, such as a consistent colour direction or a balance of understated and expressive surfaces. A single leather type cannot create a complete brand identity. Your palette should connect products while leaving room for each one to meet its own functional demands.
- Function: What handling, movement, or wear should it suit?
- Customer: What should the product feel and look like in use?
- Construction: What structure, folds, seams, or details does the design require?
- Visual character: Which colour, texture, and finish cues should unify the range?
Keep this checklist beside your first material shortlist. It gives every candidate leather the same starting test, so an appealing sample earns its place through fit, not appearance alone.
Understand Leather Characteristics Before Choosing a Material
Once you know what a product needs to do, compare candidate leathers by their actual characteristics, not by a familiar name or appealing description alone. Thickness, temper, surface, grain, finish, and available cut each offer a different clue. Together, they help you judge whether a material suits the pattern, construction, and visual direction of a particular product.
A material characteristic describes the leather; it doesn’t, by itself, guarantee how a finished product will perform. Construction, pattern, and how the material is used all matter. Use specifications to narrow the options, then test the leather in the context of your design.
How do thickness, temper, and surface affect product design?
Thickness is measured in millimetres. It affects how a piece fits a pattern, how layers come together, and how much structure the design calls for. A thicker material may change the way an edge or fold sits, while a thinner one may be easier to work into a layered construction. Compare thickness within the same product role, and account for any lining or additional layers.
Temper describes how firm or flexible the leather feels in the hand. A firmer temper may suit a design that needs to hold its shape; a more flexible temper may be easier to form around a curve or fold. Neither is automatically better. Consider how the pattern handles the material and whether the finished piece should feel structured or supple.
Surface and grain shape the first impression. Natural variation or a pronounced texture can become a visible design feature, while a more uniform surface may better support a clean, restrained look. Finish influences that appearance too. Assess these qualities together, since a distinctive surface may be welcome on one design and distracting on another.
How do tannage and leather type shape the material choice?
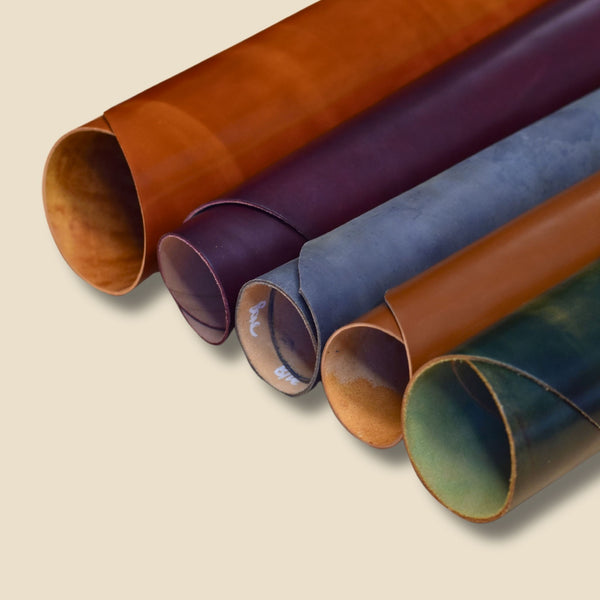
Tannage is another point of comparison. Vegetable-tanned describes a method of tanning, but the label alone doesn’t tell you whether a particular leather suits your pattern, desired temper, or finish. Treat it as one piece of information alongside the material’s measured thickness, surface, and cut. For example, the Pueblo leather collection gives you a specific material family to assess against those criteria.
Leather may also be described by animal source, including cow, sheep, goat, horse, and pig. Cordovan is another category you may encounter. These names help identify what you’re comparing, but don’t replace an assessment of the individual leather’s feel, finish, or available cut. A category is a starting point, not a complete design specification.
Hab-To Leather House focuses exclusively on vegetable-tanned leather, with options including Pueblo. These names provide useful context for your shortlist, but they don’t decide the choice for you. Compare each candidate against the same requirements rather than assuming a tannery or material name predicts a particular result.
For a repeatable review, record each candidate’s thickness in millimetres, temper, surface and grain, finish, and available cut. Then handle it and consider how it works with your actual pattern. Keep observations separate from assumptions: “firm in hand” is an observation; “will hold its shape in every design” is a performance claim your sample alone can’t establish.
If you’re assembling materials and making supplies for evaluation, browse leathercraft bundles as one practical starting point.
Compare Leather Options by Product Role and Range Consistency
With product needs and material characteristics mapped out, assign each candidate a role in the range. This shifts the question from “Which leather is best?” to “Which material choices make sense for this product, and how will they sit beside the others?” A bag and a belt may need different qualities, but a shared palette and considered design details can still make them feel like part of one collection.
Use the comparison below as a starting point, not a set of fixed rules. The feel and appearance you want depend on the pattern, construction, and intended design. For bag-specific decisions, see Artisan’s Guide to Premium Leather for Handbags alongside the available leather for bags.
| Product role | Required feel | Appearance to consider | Trade-off to weigh |
|---|---|---|---|
| Structured bag | Enough body for the planned shape, balanced with the design’s flexibility needs | A surface that supports the bag’s intended visual character | More structure may affect how the pattern folds and assembles |
| Belt | A feel suited to the design and the way it will be worn | A finish and colour that work with the range | A distinctive surface may become a stronger visual feature than intended |
| Small accessory | Manageable in compact pieces, folds, and layered construction | Grain and finish visible at close range | Prominent variation can make pieces look less uniform |
| Soft or detailed design | Flexibility suited to curves, folds, or fine construction | Texture and finish that complement the details | A highly expressive surface may compete with intricate design work |
| Lining or accent | Appropriate to its supporting role in the construction | Compatible with the exterior colour and finish | A contrast can add character, but may divide the palette |
Which material qualities suit different product roles?
Think in roles: a core material for the main panels, a lining for the interior, or a more visually distinctive option for a small accent. A structured bag and a soft accessory may call for different material choices even within the same range. The pattern matters too. Seams, folds, layers, and panel size all influence how a material behaves in the finished construction, so don’t assign performance to a category name alone.
How can a product line stay visually coherent?
Build a compact palette around compatible colours, surface character, and finishes. Select one core leather to establish the range’s signature, then add a limited number of complementary materials for linings, accents, or specific product roles. Cohesion doesn’t mean every item uses identical leather. Repeated choices in stitching, edge treatment, hardware, or colour can connect products made from different materials.
Before expanding the palette, compare the materials side by side and ask whether each one contributes something useful. If two options serve the same role but create very different visual effects, decide whether that contrast strengthens the collection or makes it harder to recognise. Keep the strongest choices, and let product function justify the variations.
If you’re gathering materials for a coordinated range, explore leathercraft bundles as a practical place to start comparing options.
How to Test and Select Leather Before Committing to a Range
A shortlist narrows the field, but a hands-on test helps you judge how a candidate fits your design. Use one consistent process for every material. That way, you’re not comparing one sample by colour and another by feel, or letting a memorable first impression outweigh the needs of the product.
Hab-To offers leather samples for evaluation; a nominal fee may apply. Use them to assess the details that matter to your design, then make a representative prototype before standardising a material across a range.
What you will need
- Labelled leather samples or small cuts of the materials you’re comparing.
- Your product brief and the pattern, or a representative pattern section.
- A consistent place and light source for comparing and photographing samples.
- A notebook or scorecard for recording observations and prototype adjustments.
- Leathercraft bundles to help gather relevant materials for testing and making.
What should makers record when comparing samples?
Keep each sample labelled with its material details. Compare them under the same lighting and on the same surface, then photograph them in the same position. Record thickness, colour, surface, and feel. A simple scorecard can cover product suitability, visual fit, handling, and construction, with a brief note explaining each rating.
Separate essential requirements from qualities that can vary between products or batches. For example, a design may need a consistent colour direction while allowing some surface variation. Writing down that distinction gives future comparisons a clearer basis than relying on memory.
How can a prototype validate the material choice?
Use the intended pattern and include the seams, folds, edges, and hardware that shape the finished design. As you work, note how the leather handles during cutting and assembly, and whether the construction matches your plan. Treat these as observations about your test, not guarantees about every piece of leather.
After making the prototype, compare it with your scorecard. Record what you’d keep or revise in the material brief, including any adjustments to the construction. If a candidate suits one design but not another, give it a specific role rather than stretching it across the whole range. These notes can guide your next sample comparison and support more repeatable choices.
Prepare for your next test: Explore leathercraft bundles for sampling and making.
Build a Practical Leather Sourcing Plan for Your Product Line
A sound material decision becomes useful when you can source it in a way that suits the stage of your range. Start with what you need to learn, not with a large commitment. A prototype may call for a small cut; a sample run may need enough leather to make several pieces and compare them; established production may call for a more considered plan for repeat orders.
Leather is available from Hab-To in small cuts, panels, or shoulders, so you can evaluate a material without buying a whole hide. There’s no minimum order quantity, and bulk discounts are available. Match the format to the work ahead: choose enough for a meaningful prototype, then plan a sample run when you need to assess how the design comes together across multiple pieces.
How can small makers source materials at a manageable scale?
Begin with a short sourcing brief. Include the product role, the material qualities your prototype needs, the quantity required for testing, and the details you want to compare. Then explore the leather collection against that brief. A focused list makes it easier to compare relevant options and avoid buying material simply because it looks appealing on its own.
For guidance on planning a purchase, the article Buying Leather Online: The Professional Artisan’s Guide to Sourcing Hides offers a related resource on sourcing considerations. Keep your own test notes beside it: record what you’re sourcing for, what you need to evaluate, and what will count as a good fit for the next stage.
As your needs grow, distinguish testing from production planning. A small cut can help you understand a candidate material in your pattern. Panels or shoulders can support work that needs more material for a prototype or sample run. For an established range, use the information from those tests to define the material and sourcing requirements you’ll use for future purchasing.
Prices include VAT for purchases within the Netherlands and are VAT exclusive for purchases in other countries.
Where can makers get help refining their material choices?
Some decisions are easier to discuss with someone who knows leather. Mike offers free 15-minute video consultations to talk through project-specific material choices. Bring a concise brief: the item you’re making, the construction details that matter, the qualities you’re comparing, and any notes from your sample or prototype. That gives the conversation a practical focus and helps you think through the options without assuming one material suits every design.
Use the advice as a sounding board, then make your decision against your own pattern and test results. The aim isn’t to make every product identical. It’s to build a sourcing plan that connects a recognisable palette with the needs of each item, and that you can return to as the range develops.
A considered shortlist, a manageable test purchase, and a written material brief are enough to take the next step. Start with the leather and making supplies that support your evaluation.
Turn Your Material Choices into a Confident Next Step
Your first sourcing plan doesn’t need to settle every decision. Let each prototype inform the next, and refine your material choices as your range develops. That’s how to choose leather for your product line with care: keep learning from the work itself.
For your next step, explore related guidance on handbag materials and sourcing leather online:
- Artisan’s Guide to Premium Leather for Handbags
- Buying Leather Online: The Professional Artisan’s Guide to Sourcing Hides
Ready to explore materials for your next project?
Start with a material that fits your next design, then let your range grow with confidence.
Frequently Asked Questions
Can I choose leather for a product line without buying a whole hide?
Yes. Hab-To has no minimum order quantity, and leather is available in small cuts, panels, or shoulders. A small cut can help you assess a candidate in part of a pattern, while a larger piece may suit a fuller prototype. Leather samples can also be requested, and a nominal fee may apply. Choose a format that lets you evaluate the qualities your specific design depends on.
How do I choose leather thickness for products I plan to sell?
Start with your pattern and construction, not a thickness figure associated with a broad product category. Consider how many layers meet at seams, where the design folds, and how much structure the finished piece calls for. Then test the candidate in a relevant pattern section or prototype. Thickness matters, but temper, surface, and assembly choices also affect how the material works in your design.
Is vegetable-tanned leather suitable for every product line?
Not automatically. Vegetable-tanned leather can suit many craft and leather-goods applications, but the right choice depends on the design’s use, construction, and appearance. Hab-To focuses exclusively on vegetable-tanned leather, giving makers a consistent sourcing principle to work within. Still, assess each candidate against the product brief and test it in the intended design rather than assuming one material will suit every item.
How can I make different leather products look like one collection?
Choose a few visual cues to repeat, such as a core colour direction, compatible surface character, or a consistent approach to stitching and hardware. Then let each product use the material that suits its construction. For example, an accent or lining can differ from the exterior while still supporting the same overall palette. Keep a record of approved choices so new designs have a clear reference point.
Can I request leather samples before choosing materials?
Yes, you can request leather samples from Hab-To; a nominal fee may apply. Label each sample with its material details and compare it under the same lighting as the others. A sample helps you assess qualities such as colour, feel, and surface, but it may not tell you everything about making the full design. For that, test your shortlisted material in a representative prototype.
Does Hab-To have a minimum order quantity for leather?
No. Hab-To has no minimum order quantity, so you can source leather for a test or a larger production need without a minimum wholesale volume. Available formats include small cuts, panels, or shoulders. Bulk discounts are available on product pages. Choose a quantity that fits the work you plan to do and the amount of material your design requires.
Can someone help me match leather to a product design?
Yes. Mike offers free 15-minute video consultations to discuss project-specific material choices. To make the conversation useful, prepare a short description of the product, its construction, and the look you’re aiming for. If you’ve shortlisted materials, have their details and your observations ready. The discussion can help you consider the options, while testing the leather in your own design remains an important part of the decision.
Disclaimer
All our blog articles are made for information purposes only we dont take responsability for any content from third parties.