


Leather for Beginner Projects: Choose by Tannage and Temper
The best leather for beginner projects is often vegetable-tanned leather, especially when you want to practise cutting, punching, stamping, or shaping. For many starter projects, a weight of 4 to 6 oz offers a useful balance of structure and manageability. But the right choice still depends on what you’re making.
It’s easy to assume one type of leather will suit every first project. In practice, tannage, weight, temper, and finish all affect how leather feels and behaves. A flexible bag calls for a different choice than a firm case or belt. This guide explains what those differences mean and how to match leather to bags, belts, cases, sheaths, and other simple projects. You’ll also learn why vegetable-tanned leather is a practical starting point for many makers, and when a different temper or finish may suit your project better. Choose with purpose, and the material becomes part of the learning process rather than a source of guesswork.
Key Takeaways
- Match leather’s firmness and flexibility to the shape your project needs, rather than choosing by appearance alone.
- Learn when vegetable-tanned leather suits hands-on techniques and when a different tannage or finish may be a better fit.
- Compare cuts by consistency and intended use so you can choose material that makes sense for a first project.
- Identify the basic tools and materials that support clean cuts, reliable stitching, and tidy edges.
- Explore simple projects that let you practise core skills, then find leather and tools suited to your next step.
Choosing leather for bags, belts, cases, and sheaths
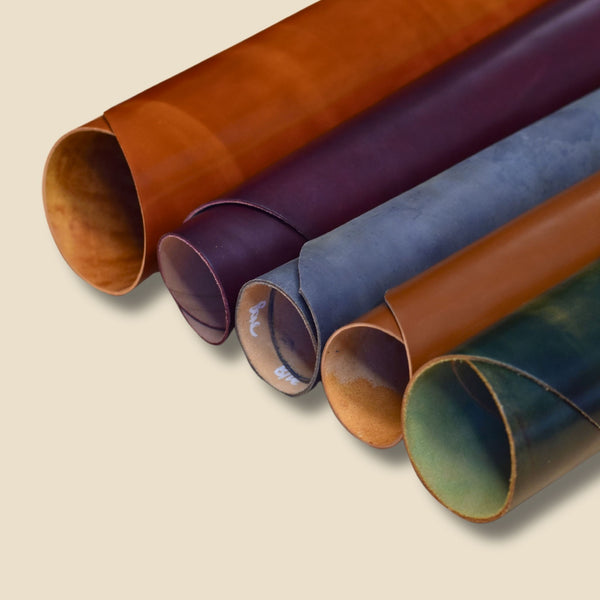
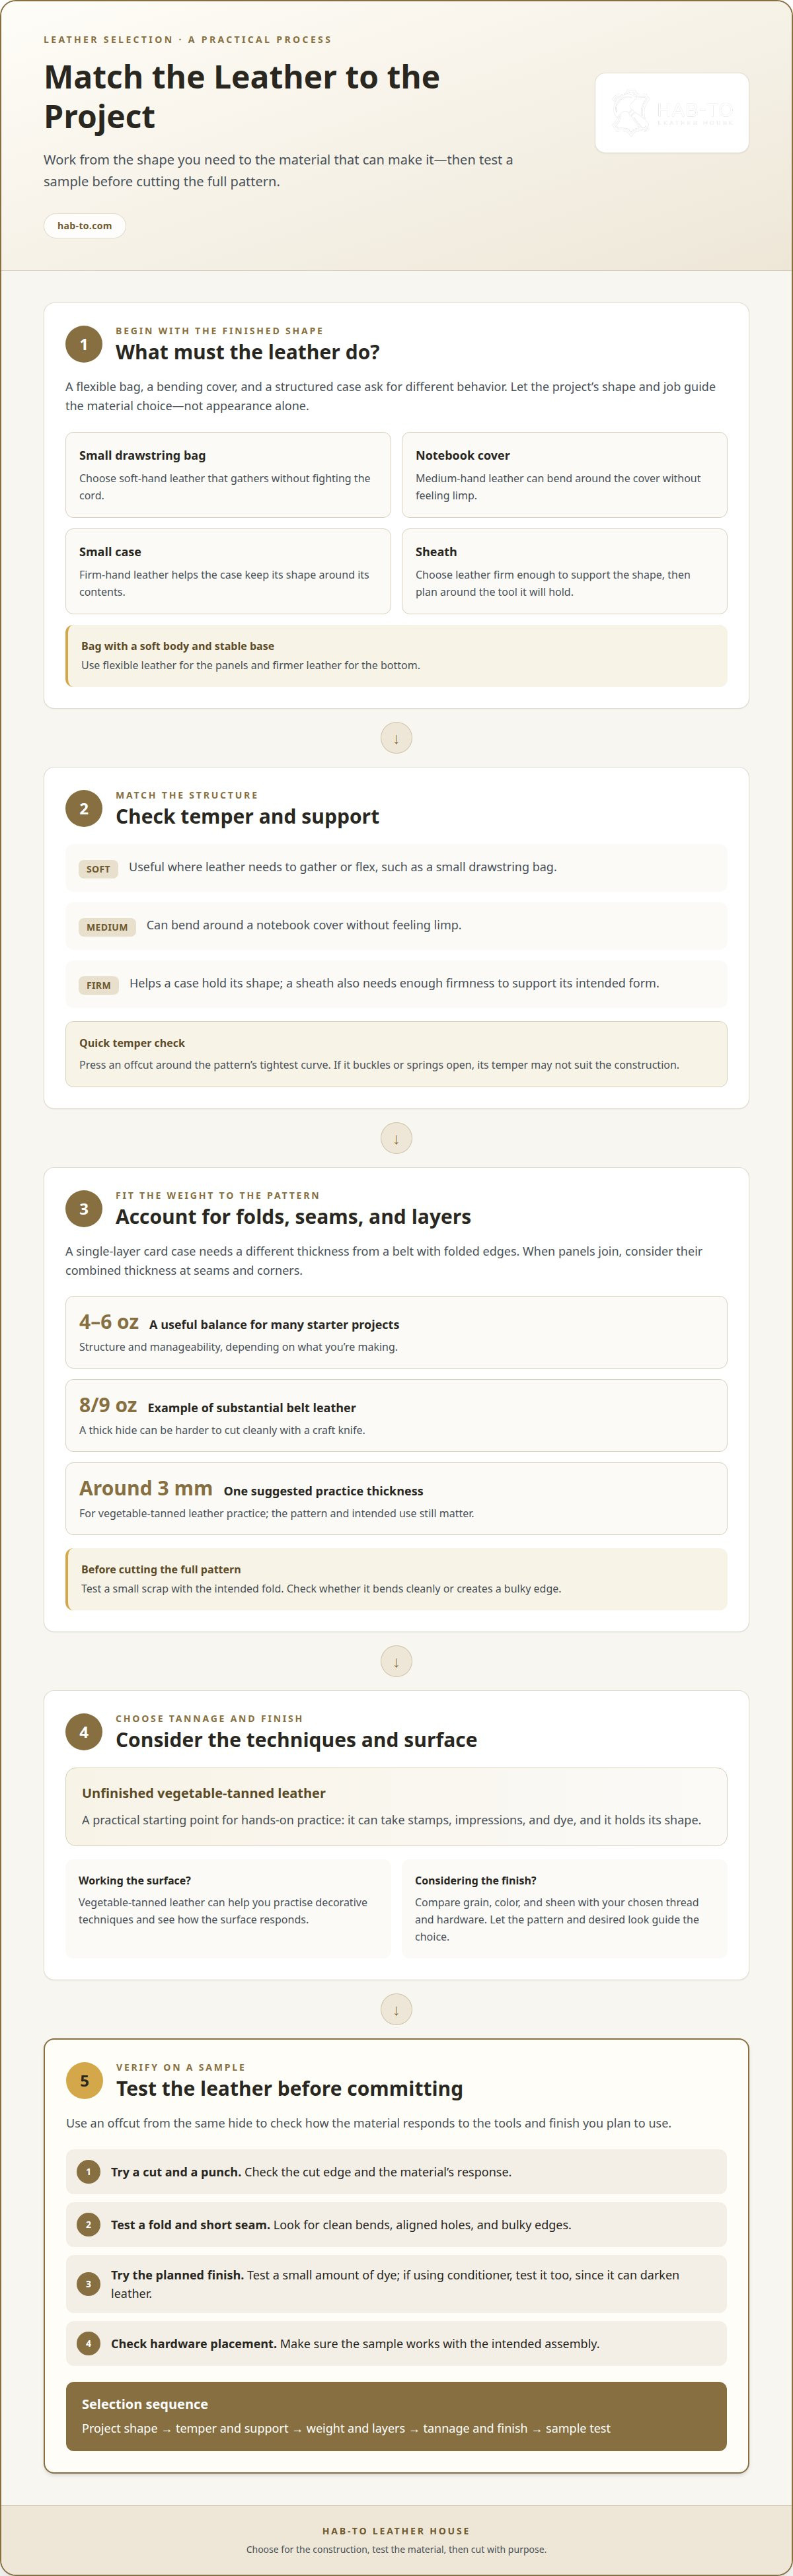
Start with the shape and job of the finished piece. A soft drawstring bag needs leather that gathers without fighting the cord; a small structured case needs a firmer temper that resists collapsing. For a bag with a soft body and stable base, choose flexible leather for the panels and firmer leather for the bottom. Browsing cow-hide leather can help you compare material options for bag panels.
Belts need more body than a pouch or notebook cover because they must hold their form during wear. An 8/9 oz belt blank is one concrete example of substantial belt leather. For a first belt, consider how the leather’s thickness affects cutting, edge finishing, and the feel of the finished strap. A thick hide can be harder to cut cleanly with a craft knife.
Use these project examples to narrow down your choice before cutting:
- Bag: Choose soft-hand leather for a small drawstring bag; use firmer material where the design needs support.
- Notebook cover: Medium-hand leather can bend around the cover without feeling limp.
- Small case: Firm-hand leather helps the case keep its shape around its contents.
- Sheath: Choose leather firm enough to support the intended shape, then plan the pattern around the tool it will hold.
Next, match the leather weight to the pattern and its layers. A single-layer card case needs a different thickness from a belt with folded edges. If the design joins two panels, account for the combined thickness at seams and corners. Test a small scrap with the intended fold before cutting the full pattern. This quick check shows whether the leather bends cleanly or creates a bulky edge.
Finally, consider the finish in relation to the project. A notebook cover may benefit from leather whose surface already suits the intended look, while a sheath or small case may call for material that accepts shaping. Let the pattern’s structure, required flexibility, and desired finish guide your selection instead of choosing by color alone.
Vegetable-tanned leather for beginners
For many makers, the best leather for beginner projects is unfinished vegetable-tanned leather. It takes stamps, impressions, and dye, making it useful for practising decorative techniques and seeing how the surface responds.
Cost Per Square Foot
Cost per square foot is the price for one measured square foot of leather. In the United States, the cost varies with the hide section, grade, thickness, and finish. Compare usable area, not just the stated measurement, because irregular edges may leave less room for pattern pieces. A card holder uses less continuous material than a larger project, so the cut and pattern affect how far each square foot goes.
Finding Scraps, Sides, and Starter Kits
Beginners in the United States can find scraps, sides, and starter kits through leathercraft suppliers and specialist online stores. Scraps work well for trying a stamp or testing dye before decorating a finished piece. Sides provide larger, more continuous areas for patterns with broader panels. A leathercraft starter bundle can group supplies for an initial project.
Testing and Finishing a Sample
Before cutting the pattern, use an offcut from the same hide to test your tools and finish. Try a cut, a punch, and a small amount of dye on the sample. If you plan to use conditioner, test that too, since it can darken leather. These checks show how the material responds before you treat the finished project.
Why Vegetable-Tanned Leather Works for Practice
Vegetable-tanned leather holds its shape and can accept impressions, making it useful for small projects such as a stamped card holder or shaped case. Around 3 mm is one suggested starting thickness for practice, though the pattern and intended use matter. To identify the best leather for beginner projects involving tooling, look for a piece that feels supple without being too soft or too hard. Start with a scrap, then use a larger piece once you understand how it behaves.
Choosing leather by tannage, weight, temper, and finish
The best leather for beginner projects depends on how the material behaves during construction. Weight affects seam bulk, temper affects how panels bend, and finish affects the surface you’ll work with. Assess these traits together, especially if the pattern joins several layers or has tight corners.
Start with the finished shape. A flat card sleeve can use leather that bends around a fold, while a structured case needs panels that resist collapsing. For layered seams, consider the combined thickness at the edge. A test fold and short sample seam reveal whether the pieces meet neatly or create an awkward ridge.
Temper determines how leather responds to handling. Very soft leather may shift while you mark or punch it; rigid leather can resist a close fold. Press a small offcut around the pattern’s tightest curve. If it buckles or springs open, its temper may not suit the construction.
Finish influences the surface and the final appearance. Compare how the grain, color, and sheen look beside your chosen thread and hardware. A Pueblo leather example gives you a specific material to consider alongside your pattern’s visual design and assembly needs.
For cutting and hand stitching, use a knife and cutting mat, along with stitching chisels, a hammer, needle, and thread. A ruler helps guide straight cuts. These tools support accurate edges and aligned stitch holes, which matter when joined panels need to sit evenly.
Before committing to the full pattern, test a scrap with the same fold, seam, and hardware placement. Check whether the cut edge stays clean and the holes remain aligned through the layers. This small sample can reveal construction problems early and help you adjust the pattern or material choice.
When choosing the best leather for beginner projects, judge the sample by how it performs in the actual build, not by one trait alone. A clean cut, manageable fold, and even seam show whether the combination suits your method. Keep the test piece beside the pattern as a reference while assembling the project.
Which leather cuts and grades offer the best value for beginner leathercraft?
A shoulder is a popular, affordable cut for beginner leathercraft, with 5-7-ounce leather highlighted as a favored thickness. Its broad working area can suit projects that need longer pattern pieces, such as a belt or small bag. Compare the usable surface with your pattern, not just the cut name. A piece is better value when it supplies the shapes your project needs with less leftover waste.
Buying leather by the square foot can be an affordable option for small projects. It lets you match the amount of material to a card holder, key fob, or simple case instead of planning around a larger hide section. Before choosing a piece, lay out the pattern shapes mentally and consider whether they fit its usable area. For a belt, a continuous strip matters more than small, separated offcuts.
Leather grades matter because appearance and consistency affect the finished piece. For a first project, decide whether visible marks or variations in grain will work with the design. A plain card sleeve can accommodate variation more easily than a large, uninterrupted bag panel. Matching the appearance across paired pieces also helps the project look deliberate.
Thickness can vary across a natural hide, so assess the specific area where each pattern piece will sit. Bellies are usually 8-14 ounces thick, and their thickness can vary widely. That variation may complicate a design requiring even layers. A small project with separate components can make better use of varied sections than a pattern needing one consistent panel.
Use the project to guide the cut:
- Belt: A shoulder is a practical starting point, and leather suited to belts can help narrow the selection.
- Small case: A square-foot piece or suitable offcuts can reduce unused material.
- Bag panel: Prioritize a continuous area with a consistent look across visible sections.
For a first purchase, the best value is material that suits the pattern, technique, and finish. A lower-cost cut can create more waste if its shape or thickness doesn’t fit the project. Choose the cut first, then assess its usable area and consistency.
What You Will Need
Before starting, turn the project pattern into a materials list. Note each leather panel, closure, reinforcement, and finish it calls for. This keeps the build focused and helps you avoid supplies that don’t suit the design.
Leather and pattern: Set out the pattern and the leather selected for its panels. Keep a matching offcut nearby to test surface treatments or edge finishes. If the design includes a lining or reinforcement, add those pieces to your materials plan before assembly.
Adhesive and hardware: Some patterns use glue to hold layers in position, while others need closures, buckles, or rivets. Match each component to the construction. For example, a pouch with a snap needs compatible hardware and a setting method; a simple folded sleeve may not need a closure.
Edge finishing: Exposed edges may need their own finishing supplies. An edge beveler can remove a sharp corner, while Tokonole is used for leathercraft edge finishing. Test the treatment on an offcut first, especially if the edge will remain visible on a card holder or strap.
- Pattern materials: leather panels, plus any lining or reinforcement the design requires.
- Assembly supplies: leather glue and project-specific closures or fittings.
- Edge treatment: an edge beveler and a suitable finishing product.
- Practice material: matching offcuts for testing finish and assembly choices.
Tool needs depend on the construction, not just the project name. A wallet with folded edges needs different preparation from a pouch with a snap. The leatherworking tools collection includes options for tasks such as edge finishing and assembly, helping you focus on tools that match your pattern.
Gather the pattern, materials, hardware, and finishing supplies before you begin. This makes it easier to spot a missing component while the project is still on paper, rather than after cutting the leather.
Easy beginner projects
A first project should be small enough to finish, but interesting enough to hold your attention. Choose a pattern that shows the piece’s shape, holes, and assembly order. A clear template reduces guesswork and lets you focus on cutting, stitching, and edge finishing instead of working out construction details.
Try a simple wallet, bracelet, watch strap, or sunglasses case. Each lets you practise a different part of the craft. A bracelet develops clean cutting and edge work; a watch strap adds narrow, paired pieces and hardware. Choose a project you’ll enjoy using. That interest can help you stay patient through the careful steps.
Use this sequence to keep a small project manageable:
- Pick one pattern: Choose a design with few pieces, such as a bracelet or basic wallet.
- Read the template: Identify folds, stitch lines, holes, and any hardware before cutting.
- Test on a scrap: Practise a straight cut and a short row of stitching before working on the main pieces.
- Cut and assemble: Follow the pattern, keeping paired edges aligned as you join them.
- Finish the edges: Smooth exposed edges for a more polished result.
A journal cover or dog collar can be a satisfying next project when you’re ready to work with larger pieces. Patterns keep dimensions and placement clear, while a small test piece lets you practise a new cut or stitch without risking the main material. For a project with hand-sewn seams, leather stitching bundles offer tools and supplies suited to stitching work.
Keep your first attempt simple. A straightforward wallet teaches layout and assembly; adding pockets or decorative tooling increases the number of decisions. Finish one version before changing the pattern. You’ll see which steps feel comfortable and which skills to practise next. Then choose a project that builds on one skill, such as cleaner stitching or more consistent edge work.
Hab-To Leather House: Leatherworking Tools
Hab-To Leather House is a natural next step when your project needs suitable leather, hardware, or tools. Its offerings can support the choices discussed in this guide, from selecting material to preparing for cutting, stitching, and assembly. Start with your pattern and technique, then focus on the supplies those decisions require.
For a first wallet, card holder, or small case, the right tools depend on how it’s constructed. Cutting and measuring tools help shape pattern pieces; stitching tools support hand-sewn seams. Hardware matters when the design uses closures or attachments. Hab-To Leather House’s leatherworking tools collection brings together options for different leathercraft tasks, so you can focus on what fits your project.
Vegetable-tanned leather is useful for projects involving stamping, impressions, or dye. Its working qualities make it a practical option for makers who want to practise these techniques on a first project. Choose it when your pattern and finish call for leather suited to hands-on surface work. For other projects, start with the material’s intended use and the construction it requires.
Hab-To Leather House also supplies equestrian-related leathers and hardware for projects involving equestrian equipment, rather than a small wallet or everyday case. Its leathercraft tools, hardware, and leather bring key materials and construction components together. Match each component to the pattern to keep your selection purposeful.
- For cutting and stitching: Choose leatherworking tools that match the techniques in your pattern.
- For surface work: Consider vegetable-tanned leather when stamping, impressions, or dye are part of the design.
- For equestrian projects: Explore equestrian-related leathers and hardware for relevant builds.
- For assembly: Select leather and hardware according to the pattern’s construction.
A clear project plan makes it easier to choose useful materials and avoid tools your design doesn’t require. Whether you’re making a simple first piece or planning a more specialized build, let the project’s function guide your selection.
Contact Hab-To Leather House to discuss your leathercraft project.
Frequently Asked Questions
What type of leather is easiest for beginners to work with?
For a first hand-built piece, choose leather that stays steady under your pattern and tools. Stable material makes it easier to mark matching panels and keep edges aligned during assembly. The easiest option also depends on the project: a structured card case needs different handling from a soft, gathered pouch. Choose material for the shape you want to make, not simply because a project is labelled beginner-friendly.
What is the difference between vegetable-tanned and chrome-tanned leather for beginner projects?
For beginners, a useful distinction is how much control you want over the leather’s final appearance. Vegetable-tanned leather suits projects where you want to add your own decorative treatment. Chrome-tanned leather often comes with a finished surface, which may suit a design that relies on its existing appearance. Decide whether surface customization is part of your plan before choosing leather.
What leather thickness and weight are best for wallets, belts, and small bags?
Choose thickness by considering the finished item’s layers and stress points. In a wallet, stacked pockets and folded edges can create bulk; a belt needs a continuous strap with enough support; a small bag must bend comfortably at the seams. Check the pattern’s narrowest folds and joined edges, then choose leather that lets those areas sit cleanly without making the finished piece cumbersome.
What beginner leather projects work best with vegetable-tanned leather?
A luggage tag, bookmark, or coaster offers a manageable way to explore vegetable-tanned leather without building a complex form. These projects let you practise layout and personalize a visible surface. For a luggage tag, plan the attachment before cutting. For a coaster, keep the outline simple. A bookmark lets you focus on a clean silhouette and a finish suited to its exposed edges.
How do you choose leather that is firm enough for hand stitching but easy to cut?
Look for leather that stays steady under stitching tools without feeling rigid in your hands. The project’s shape offers a useful guide: a narrow strap needs a clean, straight cut, while a curved pouch panel must follow its pattern smoothly. Consider how the material handles both operations, since leather that stitches well may still be awkward to shape.
Related reading
- Leathercraft masterclasses explore learning opportunities for developing your making skills.
- Leatherworking tools covers tools for different craft tasks.
Project supplies
Hab-To Leather House’s leathercraft starter bundles are a practical way to explore supplies for a first project.
What common leather types should beginners avoid, and why?
Avoid chrome-tanned leather for tooling, molding, or dyeing because it is prefinished and does not take impressions or further coloring. Belly leather can be too stretchy for carving, and lower-quality leather is harder to carve.
Disclaimer
All our blog articles are made for information purposes only we dont take responsability for any content from third parties.