

Impressing Friends with Your Craft Skills: A Leathercraft Guide
What if the project that gets the biggest reaction from your friends is a simple leather piece, made with care? Impressing friends with your craft skills isn’t about tackling the most complicated design or hiding every mark of the process. It’s about choosing a project that suits your experience, then giving the details the attention they deserve. A key fob or slim card holder can be both useful and personal, especially when the leather, stitching, and finish feel thoughtfully chosen.
If you’re worried your first piece might look rough, you’re not alone. Clean cuts, consistent stitching, and tidy edges make a visible difference, and each is a satisfying technique to practise. This guide will help you choose a manageable project, make a polished handmade item, and explain what you’re doing as you work. You’ll find project ideas, ways to choose materials and tools, and finishing tips that make a piece feel considered. The aim is to create something useful, share how it took shape, and enjoy the story behind the craft.
Key Takeaways
- Choose a project by balancing its everyday use, the technique you want to practise, and a personal detail for your friend.
- Build a considered look by repeating one technique and making deliberate design choices instead of adding decorative complexity.
- Use a step-by-step process that separates planning, practice, making, finishing, and presentation.
- Impressing friends with your craft skills starts with sharing the decisions and techniques behind your handmade piece, not just showing the finished result.
- Beginner-friendly materials, tools, bundles, and learning resources can help you build confidence one project at a time.
Impressing Friends with Your Craft Skills Starts with a Personal Project
A handmade leather project doesn’t need elaborate decoration or flawless stitching to feel impressive. Care shows in the choices: a shape that suits its purpose, a cut edge kept tidy, or one technique executed consistently. A useful object also gives your friend a reason to keep it close, so the thought behind it becomes part of their everyday routine.
Feeling unsure is normal, especially if this is your first time working with leather. Keep the process manageable: pick a small design, practise one skill on a scrap, then use what you’ve learned on the finished piece. That progress from practice to object is worth sharing. Tell the story of why you chose the design, what you learned, and how the material shaped your decisions. Leather crafting techniques cover many approaches, but for a first project, one well-practised detail can speak louder than several new ones.
What makes a handmade project memorable to friends?
Start with the person, not the pattern. Think about what your friend carries, uses, or enjoys, then connect the object to that routine or a shared memory. You might make a simple key fob for a friend who is always searching for their keys, in a colour that reminds you both of a favourite trip. The usefulness and the story can make the piece meaningful long after the novelty fades.
How to choose a craft challenge you can finish
Choose a project that fits your time, your confidence with tools, and the space where you’ll work. A small card holder or key fob keeps the design focused. A simple tray may suit someone who wants to practise forming a shape. Pick one focal skill, such as making consistent stitches or finishing an edge, rather than combining several unfamiliar techniques. For a material choice that feels considered, explore vegetable-tanned leather for your project.
Before you begin, make a small practice sample. It’s a low-pressure way to see how your hands handle the technique and adjust before working on the main piece. Use the sample to focus on one visible detail:
- Practise keeping stitch spacing consistent along a short line.
- Test a clean cut and edge finish on a small scrap.
- Try a simple decorative mark before deciding whether it suits the design.
Then choose the detail you want your friend to notice and give it enough attention to show clearly. That’s the heart of impressing friends with your craft skills: share a useful object and the care, practice, and personal thought behind it, rather than pretending the process was effortless.
Build the Leathercraft Details That Make Your Work Look Considered
A polished leathercraft project isn’t defined by flawless workmanship. It comes from choices that feel consistent: similar stitch spacing throughout, edges treated with care, and decoration that suits the design. Small irregularities are part of learning. The aim is to make the details look deliberate, not to hide that a person made the piece.
One technique, repeated with attention, often creates a stronger result than several decorative effects attempted at once. Repetition helps you notice what your hands are doing and make small corrections. It also gives you something clear to demonstrate: how you mark a line, guide a stitch, or refine an edge. That visible control can make impressing friends with your craft skills feel more natural than presenting an object without explaining how you made it.
Saddle stitching is a hand-sewing method in which two needles pass through the same set of holes from opposite sides of the leather. Edge finishing refines a cut leather edge so it looks neater and feels more considered. The right approach depends on the project and materials, so practise on a scrap before working on the piece itself.
Which leathercraft techniques are easy to notice?
Look at the details that guide the eye. Consistent hand stitching suggests patience because the spacing and tension appear even along a seam. Aligned holes help the stitches follow a clean path, while tidy edges give a small object a more intentional outline. A stamped impression can add a focal point, but decoration is optional. Let the shape and finish carry the design if that feels right.
Explore leathercraft tools used for leatherwork, including tools for making decorative impressions. Keep the design restrained: one small mark placed with care can be more effective than filling every open area.
How to practise without wasting project materials
Use a test piece before committing to the final leather. Practise a short run of stitching, a few holes in a straight line, or a single stamped impression. Keep the test simple. It gives you room to learn without making every attempt part of the finished design.
Change one variable at a time so you can tell what affects the result. If stitches look uneven, adjust your spacing marks while keeping your pace steady. If a stamped impression looks unclear, practise your positioning before changing the design. Follow the tool’s intended use and work with care. Keep the practice piece beside your project as a reference for spacing and rhythm.
As you build confidence, a leathercraft starter bundle can bring project supplies together. Choose one detail to refine, practise it, then let that skill give the finished work its character.
Choose a Leathercraft Project That Fits Your Skill and Your Friend
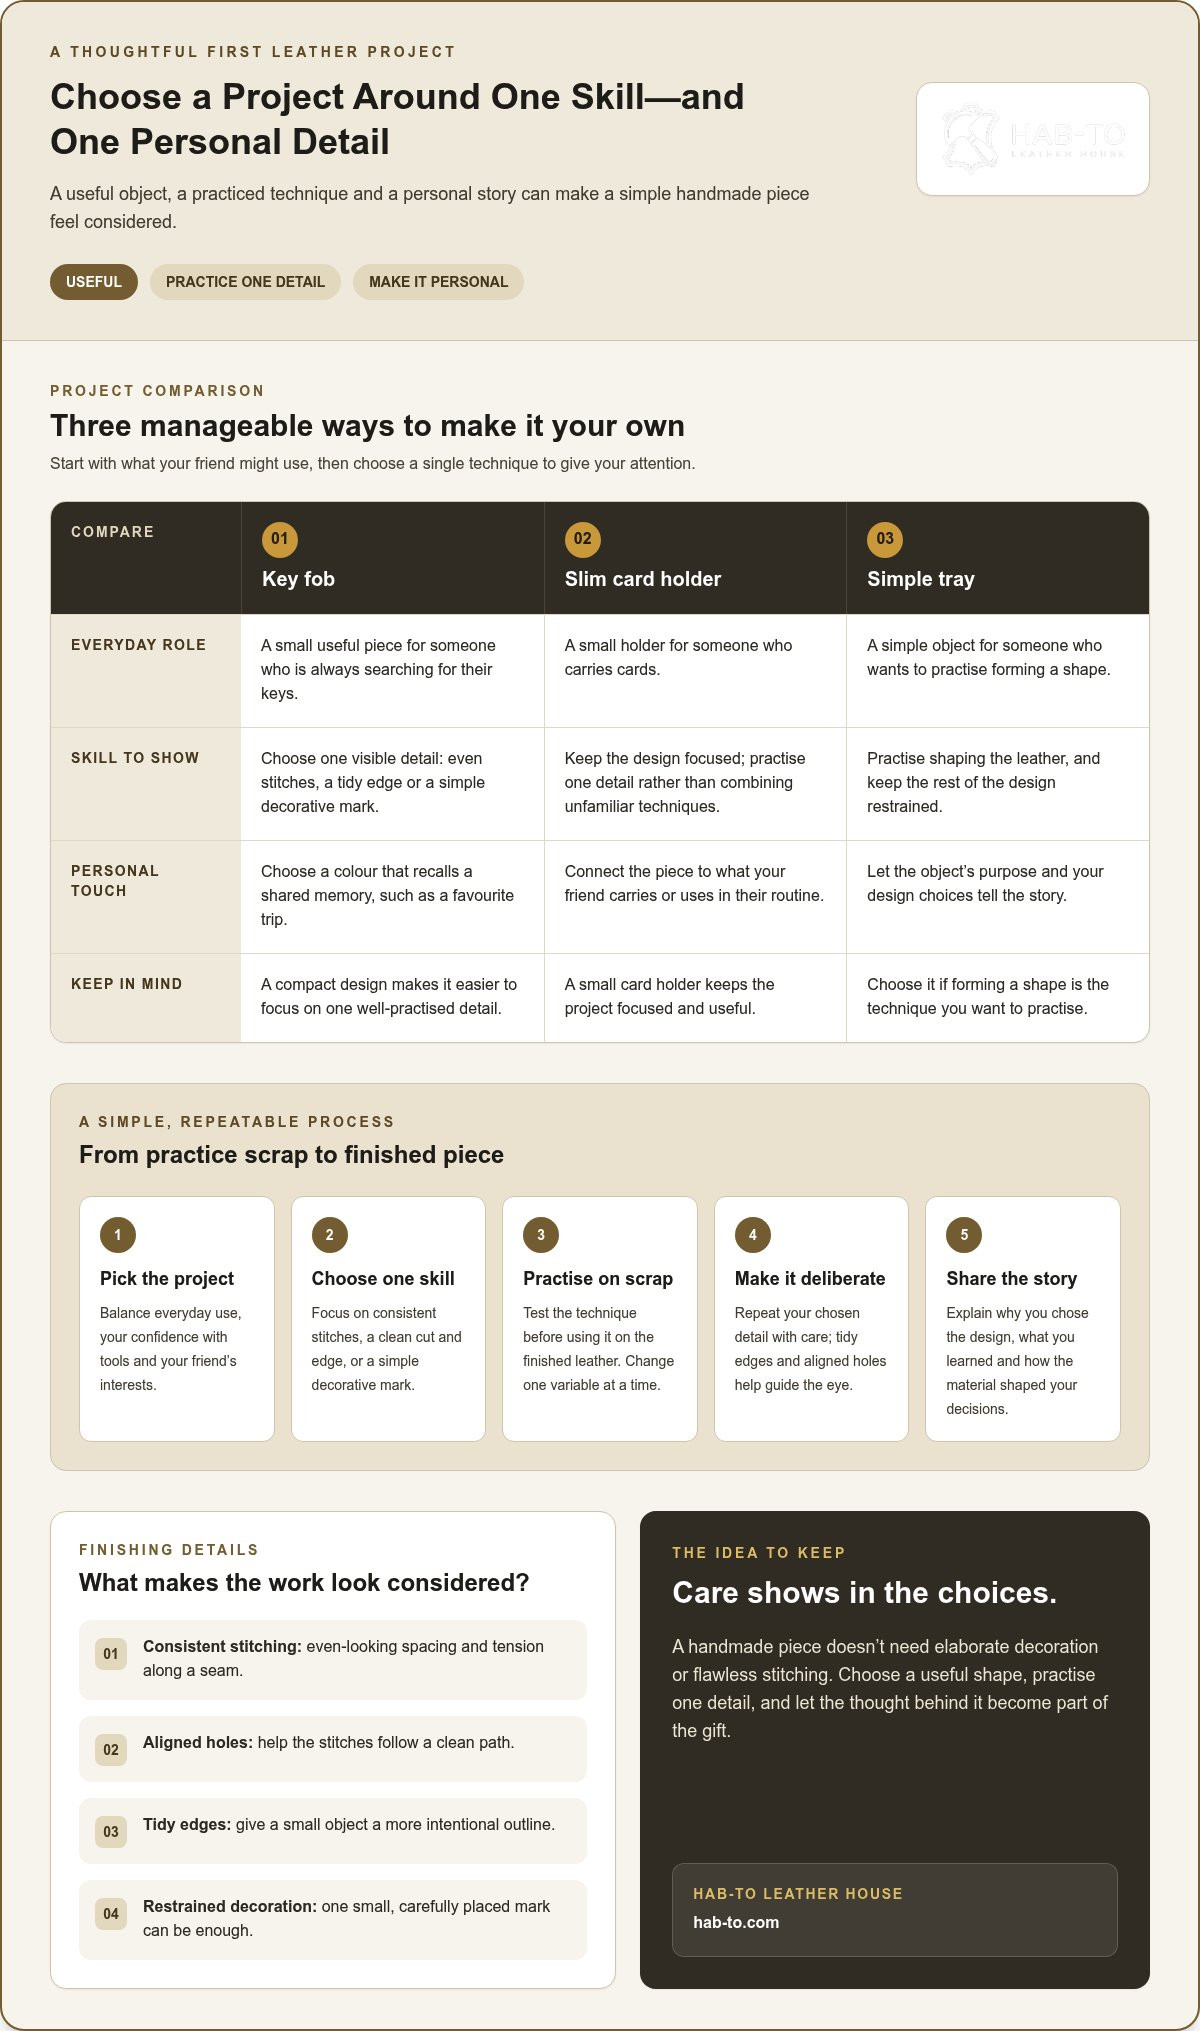
The right project gives you room to show one clear skill while making something your friend can actually use. Think about three things before choosing: what the object does, which technique will be visible, and how you can make it feel personal. A compact design can still demonstrate careful work. Choose something you can plan around your current confidence, not a project that asks you to learn every technique at once.
Which small leather projects make strong first demonstrations?
Compare options by the skill each puts on show. A cardholder offers a clear view of stitching and neat edges. A key fob keeps the shape simple, with an opportunity to practise shaping and placing hardware. A small tray is another option, particularly if forming the shape is the skill you want to explore. Its suitability depends on your design and the techniques you’re ready to practise.
| Project | Useful outcome | Visible technique | Personal touch |
|---|---|---|---|
| Cardholder | Organizes a few cards | Stitching and edge finishing | Choose a leather colour or add a small motif |
| Key fob | Keeps keys together | Shaping and hardware placement | Use a meaningful colour or simple stamped mark |
| Small tray | Holds small everyday items | Forming and shaping | Connect its use to the recipient’s routine |
Let the intended use guide your material choice, too. A friend who prefers understated accessories might suit a simple, natural-looking finish, while a bolder colour could work for someone who enjoys a stronger accent. Vegetable-tanned leather is one material option to consider as you plan the project’s look and feel. Choose for the design and recipient, rather than adding complexity just because you can.
How to personalize a project without overcomplicating it
Pick one purposeful detail. Initials, a small stamped motif, or a considered colour can connect the object to the person receiving it. A key fob in a friend’s favourite colour may feel more thoughtful than several unrelated decorative marks. A cardholder could carry a subtle impression linked to a shared interest. Keep the feature small enough to support the project’s function without distracting from its construction.
If you’re drawn to tool-marked designs, learn about stamping before making it part of the final piece. Practise the placement and impression on a test piece, and choose a simple motif that has meaning for your friend. That keeps the focus on the story behind the detail, not decoration for its own sake. A deliberate project choice gives impressing friends with your craft skills a practical foundation: a useful object, a visible technique, and a personal connection.
Make and Share Your Craft Project with a Simple, Repeatable Process
A clear sequence helps you move from an idea to a finished piece without losing track of the details. Keep each stage focused, and make decisions before cutting your leather. Consistent practice also makes a technique easier to demonstrate because you’ll know what to watch for and how to explain it.
What to prepare before starting the project
Write a short checklist based on your design. Include the leather, any hardware it requires, and the tools for your planned steps. Clear a stable workspace, then keep your pattern and practice sample within view. Choose materials that suit the object’s intended use and design.
What you will need
Your list depends on the project, but start with its pattern, leather, and any hardware the design calls for. Add only the tools needed for your planned techniques. Browse the leathercraft tools collection to find equipment relevant to your project. If your edge-finishing method uses Tokonole, explore the starter bundles for a practical starting point. Hab-To Leather House also offers leather, hardware, tools, and curated bundles with no minimum order requirement. Match your selections to the project rather than assuming every tool or material is needed.
- Set the design. Decide on the object’s shape, purpose, and one technique you want to show. Keep the pattern close by and mark where details such as stitch lines or personalization will sit.
- Prepare your workspace and materials. Check your list before beginning. Arrange the leather and project-specific hardware so you can work without searching for items mid-task. Keep the surface stable and handle your tools carefully.
- Practise on a test piece. Rehearse the step that needs the most control, such as keeping stitch spacing steady or placing a decorative mark. Compare your sample with the plan and adjust your approach before moving on.
- Make the project in sequence. Follow the pattern and work through the planned steps in order. Pause to check alignment before joining parts, when small corrections are easier to make.
- Finish and inspect. Look over the seams, edges, and hardware placement. Refine the details your design calls for, then tidy the work area before presenting the object.
How to present the finished work naturally
Let the object’s purpose lead. Show it in use, then share one challenge you encountered and one technique you learned. A short, honest story makes your process easy to follow without turning the moment into a sales-like reveal. If a friend is curious, invite them to try a simple step together, such as marking a practice line or planning a design detail.
Keep any hands-on demonstration brief and choose a suitable tool and setting. If a step involves a tool you’re still learning to control, explain it rather than passing it over. A relaxed demonstration can turn a handmade object into a shared creative moment.
Explore leathercraft bundles to find supplies for your next project.
Keep Learning Leathercraft with Beginner-Friendly Materials and Guidance
Leathercraft develops through thoughtful repetition. Give each new project one clear learning goal, then build on it when you’re ready. A familiar technique can become more controlled with practice, while your notes and finished pieces help you decide what to explore next.
How to choose learning support for your next project
Start with the object you want to make and the skill you’d like to practise. A beginner bundle can help organize project-related supplies, while guided instruction can provide structure as you learn. Hab-To’s masterclasses cover topics including leather types, basic hand stitching, dyeing and painting, and Sashiko Japanese stitching. Classes start from €65. For personalized project-selection guidance, Mike offers a free 15-minute video consultation.
Turn a first project into a craft practice
For your next piece, repeat one technique from your first project before adding another challenge. Photograph a detail at each stage and make a brief note about what you’d adjust next time. Comparing those records can reveal progress that’s easy to miss while you’re focused on the work. If a friend is interested, show them the step you practised and invite them to sketch or plan a design alongside you.
Related reading ideas
- How to choose leather for a small handmade project
- Leather edge finishing: methods and practice tips
- Leather stamping: planning a simple personalized detail
Choose supplies for your next project. Browse leathercraft bundles for an approachable starting point for your continued practice. There’s no minimum order requirement. VAT is included for purchases within the Netherlands and VAT is exclusive for other countries.
Make Your Next Leathercraft Project a New Milestone
Your next project doesn’t need to be more complicated. Build on one skill you want to strengthen, then give it a fresh purpose in something useful or personal. Each careful attempt adds to your confidence, and the process itself gives you a story to share. That’s a rewarding path to impressing friends with your craft skills, while keeping the pleasure of making at the centre.
Leathercraft is rooted in patience and practice. Hab-To brings over 160 years of family leather expertise to that tradition, alongside Mike’s more than 25 years of personal leather expertise. Use that experience as a guide as you choose your next step, whether you’re practising a familiar detail or trying a new project with thoughtful guidance.
Start with a project that feels within reach. Take your time, notice what improves, and enjoy making something that carries a little of your own story.
Frequently Asked Questions
What craft skill is most impressive to friends?
A skill that turns a personal idea into something useful can make a memorable impression. With leathercraft, a friend may notice a well-placed stamped detail or consistent stitching, but the story behind that choice adds meaning too. Explain why you selected a motif that reflects their interests, then describe what you adjusted while practising. That combination of intention and learning is at the heart of impressing friends with your craft skills.
Is leathercraft suitable for someone who has never made anything by hand?
Yes. A beginner can start without previous handcraft experience by keeping the first design simple and learning the project’s steps before cutting leather. Draw the shape on paper first, then consider which tools and materials it calls for. A leathercraft starter bundle can be one way to organize beginner supplies. Treat the first object as a chance to learn how the material responds to your hands.
How can I make a handmade gift feel more personal?
Connect the gift to a real detail about its recipient. A small leather item could reflect a colour they often wear or a symbol tied to a shared hobby. Keep the personalization legible and purposeful, then add a brief note explaining the connection. That note makes your intention clear without requiring extra decoration. Choose a design that leaves you enough attention for careful construction and a tidy finish.
Can I learn leathercraft by watching someone else make a project?
Yes, watching a demonstration can help you understand the order of the work, but observation alone won’t show you how the material feels as you handle it. Pause after each stage and try the same movement on a practice piece. Notice where your hands differ from the demonstrator’s, then repeat the motion slowly. Hab-To’s leathercraft masterclasses offer guided instruction on specific craft topics.
What should I do if my first leathercraft project has visible mistakes?
Use visible mistakes as clues for what to focus on next, not as a reason to dismiss the whole piece. Look at the result in good light and note which details affect how it works, versus which are simply signs of a first attempt. Avoid adding decoration just to draw attention elsewhere. If the object is still useful, keep it as a record of your starting point and compare it with a later project.
How can I make a craft afternoon with friends enjoyable for beginners?
Make the activity welcoming by giving everyone a clear, low-pressure role. One person might sketch a shape while another chooses a design detail, then everyone can take a turn practising a suitable step on spare material. Explain how the workspace is arranged and keep specialist tools with the person comfortable using them. Let conversation and curiosity guide the pace, rather than comparing who finishes first.
Disclaimer
All our blog articles are made for information purposes only we dont take responsability for any content from third parties.