



Five Ways to Get Consistent Results in Your Craft
Consistency doesn’t come from repeating the same motion and hoping for the best. Learning how to get consistent results in your craft means practicing with purpose, noticing what changes from one attempt to the next, and making room to improve. Repetition matters, but thoughtful repetition is what helps a skill take shape.
It’s natural to want every piece to come out perfectly. But an uneven result isn’t wasted effort; it can show you what to adjust next. Confidence grows as you work through imperfect attempts instead of letting them stop you.
In this guide, you’ll find practical ways to build more reliable work: use deliberate practice, keep showing up, let go of perfection, target skills that need attention, and study experienced makers’ work. Each approach turns observation into a useful next step, helping you focus your practice and develop your craft with care.
Key Takeaways
- Give your practice a regular rhythm, then adjust the challenge as your skills develop to avoid getting stuck in the same routine.
- Build confidence by showing up consistently and developing recognizable choices in your work, such as a familiar tone or palette.
- Aim for dependable, thoughtful work rather than perfection; each attempt can teach you what to refine next.
- Identify one weakness at a time and choose a focused exercise to address it before revising your work.
- Study how experienced makers approach their craft, then apply relevant techniques in your own practice and assess the results.
1. Progressive practice and avoiding plateaus
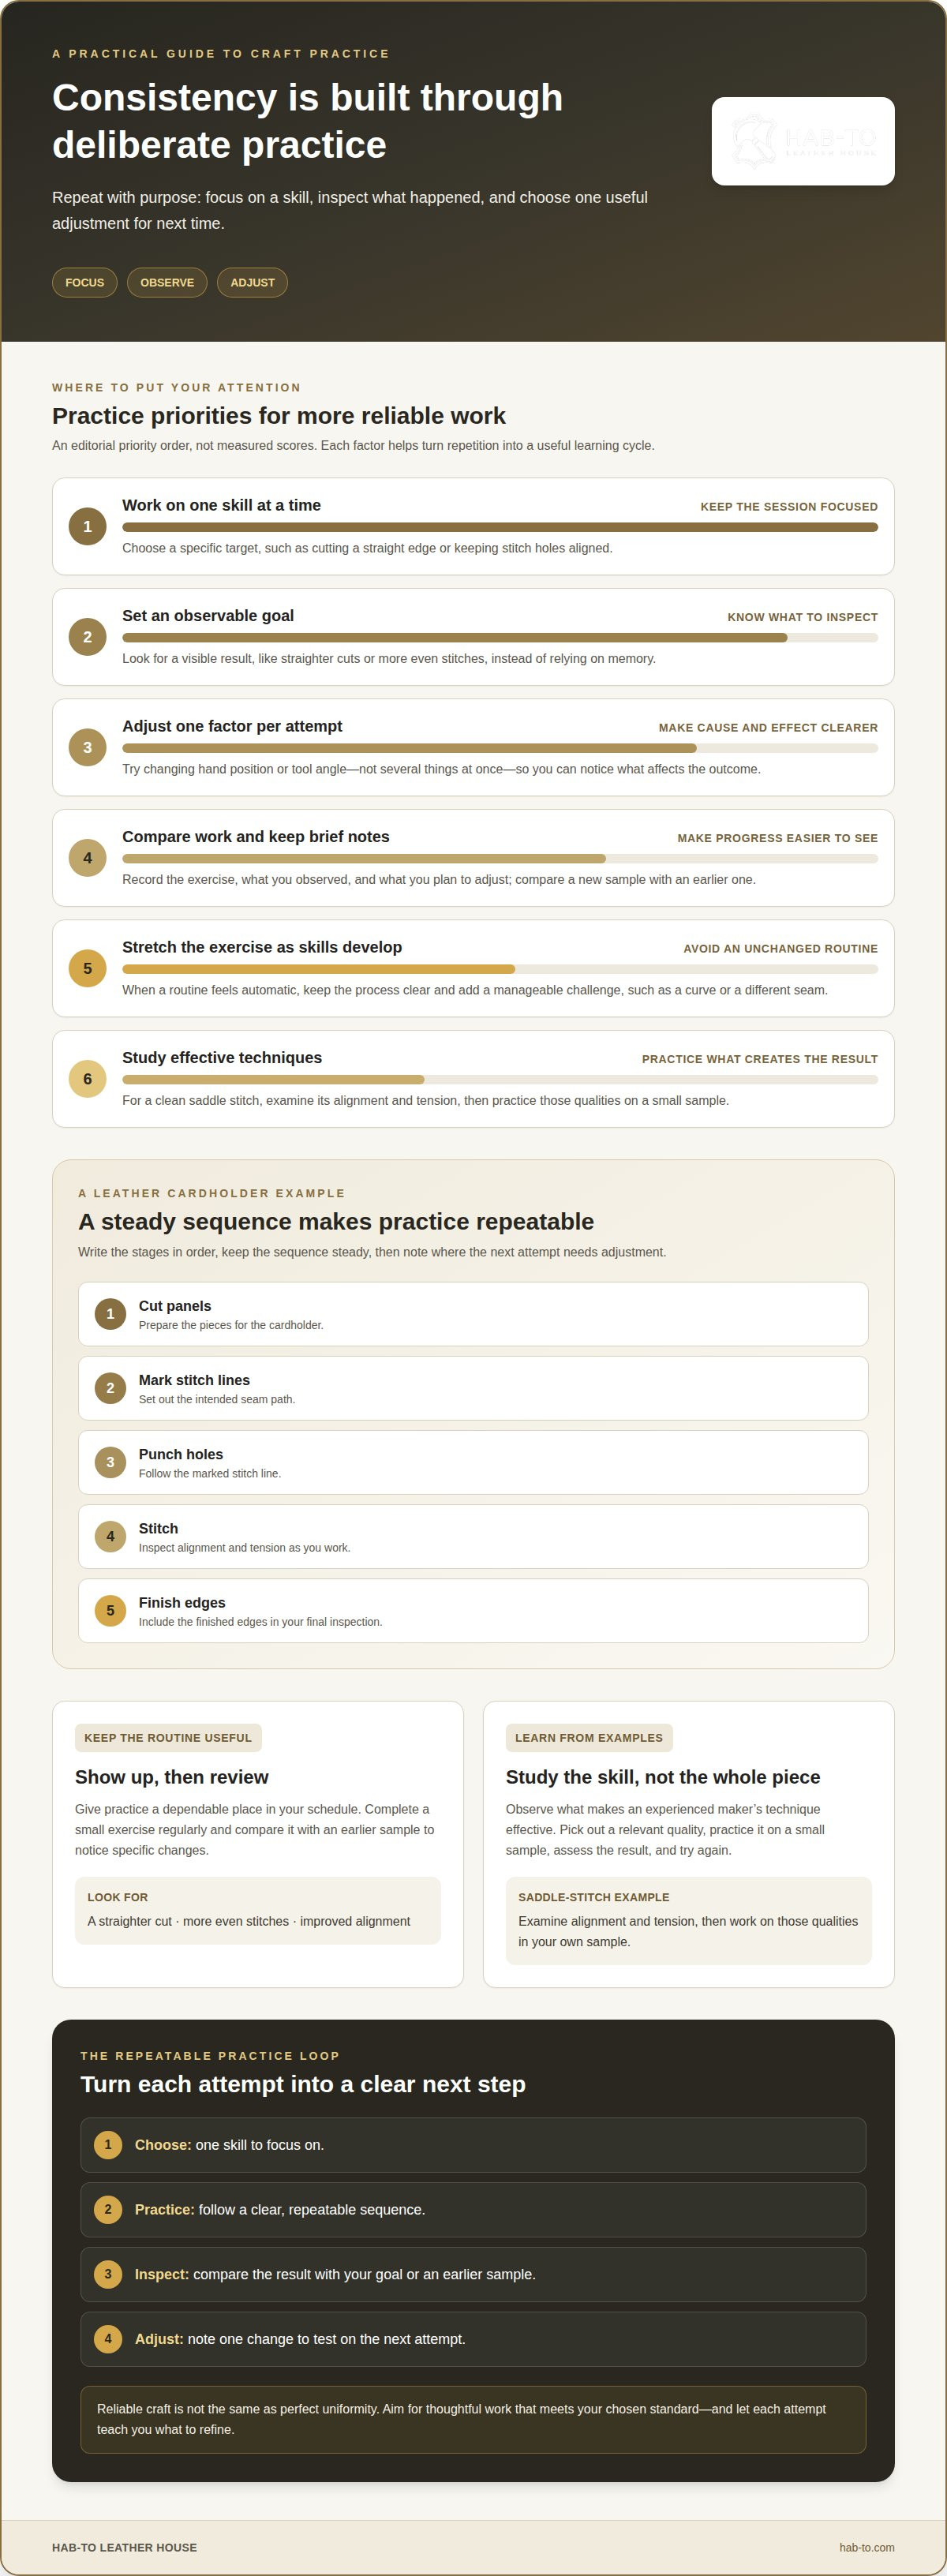
To break a craft project into repeatable steps, write its stages in order, from preparation through final inspection. For a leather cardholder, that could mean cutting panels, marking stitch lines, punching holes, stitching, and finishing edges. Keep the sequence steady, then note where each attempt needs adjustment. The Centers for Disease Control and Prevention recommends creating a production timeline that lays out the steps in a process. A simple timeline can help you see where practice fits.
What you will need
Gather the tools and material your chosen exercise requires before beginning. For a leather cardholder, that could include leather, a ruler, a cutting tool, and stitching tools. Browse leatherworking tools and select leather for a practice piece suited to your project.
Repetition builds familiarity, but repeating an unchanged exercise can stop stretching your ability. Think of repeatedly lifting 10-pound weights: once the body adapts, the same effort may no longer create progress. In leathercraft, stitching the same seam at the same pace may feel comfortable without improving stitch spacing or tension. Keep the familiar exercise, but add a deliberate challenge.
Choose one skill to work on in each session, such as cutting a straight edge or keeping stitch holes aligned. Set an observable goal, inspect the result, and adjust one factor on your next attempt, such as your hand position or tool angle. Changing one thing at a time makes it easier to identify what affects the outcome.
Give practice a dependable place in your schedule. For example, complete a small leatherworking exercise regularly, then compare it with an earlier sample. Look for a specific change, such as a straighter cut or more even stitches. Comparing samples makes progress easier to assess than relying on memory.
Study experienced makers’ work to identify what makes a technique effective. If a saddle stitch looks clean, examine its alignment and tension, then practice those qualities on a small sample. Get feedback when possible, assess what needs work, and try again. The goal isn’t to copy an entire piece, but to practice the skills that produce its results.
Keep concise notes about the exercise, what you observed, and what you’ll adjust next. According to the U.S. General Accounting Office, effective measurement depends on sound data collection and analysis, as well as communicating results to staff and management. For individual practice, a brief record helps you spot recurring issues. When a routine feels automatic, add a manageable challenge, such as a curve or a different seam, while keeping your process clear.
2. Confidence and creative consistency
Confidence in a craft grows through evidence, not by demanding that you feel certain before you begin. Keep a record of finished work, such as a sketchbook page, stitched sample, or photograph. When a later attempt feels difficult, those examples show which skills you’ve developed. They also help you notice specific improvements, like cleaner corners or more even spacing, rather than judging your ability by one frustrating session.
A consistent workspace removes small sources of doubt. Keep frequently used tools in the same place, clear the surface before starting, and use steady lighting to inspect details. For leathercraft, lay out the leather, cutting surface, ruler, and stitching tools before you begin. An orderly setup helps you focus instead of searching for equipment midway through a step.
Templates, measurements, and checklists help makers repeat a chosen standard without relying on memory. A pattern keeps component shapes consistent; measured markings guide placement; and a checklist prompts a final review of edges, seams, and hardware. These references don’t replace judgment. They preserve useful decisions so you can focus on the parts that need skilled hands.
Creative consistency doesn’t require every piece to look identical. It can come from recurring choices that make your work recognizably yours. An artist might favor a restrained color palette and quiet compositions; a leatherworker might return to a particular stitch style or edge treatment. Choose a few elements to repeat, then let the project’s purpose guide the details that change.
Use a short pre-work ritual to make starting feel manageable. Review the project sketch, arrange your tools, and make a test mark on scrap before cutting the final piece. This sequence gives you a clear starting point, especially when a project feels demanding. It also separates preparation from creative decisions that need more attention.
Confidence is easier to sustain when you define “finished” before beginning a project. For a hand-stitched wallet, that might mean checking that the panels align, the seam follows its intended path, and the edges feel smooth. Clear criteria help you assess the piece fairly, rather than continuing to alter it because perfection feels just out of reach.
Show your work in a way that feels sustainable. You might photograph each finished object against the same neutral background or share a brief note about one design choice. Repeating a format can make your creative identity clearer over time. The aim isn’t constant self-promotion; it’s to build a dependable record of what you make and what matters in your approach.
If a defined set of materials helps you prepare for a project, explore leathercraft bundles as one option for organizing your setup. Choose tools and materials that suit the work, then let your own standards guide each decision.
3. Consistency versus perfection
Consistency means your work meets a chosen standard across different attempts. It doesn’t mean every piece must be identical or free from variation. In bookbinding, you might assess whether the spine holds securely, pages turn cleanly, and covers align. These criteria describe a dependable result without requiring every handmade detail to match exactly.
Understanding how to get consistent results in your craft starts with deciding what quality means for the project. Name its purpose, then identify visible signs that show the work serves it. For an embroidered patch, you might look for secure thread ends, a readable design, and a border that holds its shape. This gives you a fair basis for assessing the finished piece.
Perfection can make small differences feel like failures. A hand-printed pattern may vary slightly between impressions, while a shifted design that obscures its subject may need correction. Decide which differences are part of the method and which interfere with the intended result. This distinction preserves handmade character while keeping standards clear.
A practical way to think about how to get consistent results in your craft is to separate essential standards from creative choices. In a sewn tote, strong seams and securely attached handles support its use. Thread color, pocket placement, and decorative stitching can vary. Keeping functional requirements steady leaves room to explore design without compromising the object’s purpose.
Skills that support consistency can be learned and refined. A paper artist can improve accurate folding by practicing on test sheets, while a glass artist can develop steadier solder lines through focused exercises. Each skill responds to attention and adjustment. A disappointing result is useful when it points to a specific technique to develop, rather than becoming a judgment about your ability.
Clear standards also help makers explain their work to customers. A ceramicist selling made-to-order mugs can describe the intended shape, finish, and function, while acknowledging that handmade surfaces may vary. Plain, accurate descriptions align the offering with what customers receive. Product photographs and written descriptions should represent the work honestly, too.
Before finishing a piece, compare it with the purpose you set. A hand-bound notebook might need a secure cover and pages that lie comfortably for writing; decorative marks can remain individual. This final review helps you decide whether another change would improve the work or simply chase an impossible ideal.
Choose one standard to maintain and one design element to explore in your next project. This balance gives your craft a reliable foundation while keeping it open to fresh ideas. The aim isn’t identical output, but work that feels intentional, functions as intended, and still carries the maker’s hand.
4. Identifying and addressing weaknesses
Track each attempt in a simple project log. Record the material, tool, technique, and result, then compare notes across finished pieces. If a painted edge looks uneven, note where it happened and what you were doing. This turns a general sense of inconsistency into a specific detail you can investigate.
Look for patterns before changing your method. If a seam wanders near a corner, compare the marking, hole placement, and hand position at that point. Change one factor on the next sample, such as how you hold the work, and observe the result. Changing several things at once makes it harder to identify the cause.
Choose practice that targets the weakness you observed. A knitter struggling with uneven tension can work a small swatch, checking whether the stitches stay consistent across each row. A woodworker whose joints leave visible gaps can practice fitting offcuts before assembling the final piece. Keep the exercise focused, then assess the specific quality it was meant to improve.
Check quality at stages where corrections are still manageable. For a leather project, inspect pattern alignment before cutting, check marked stitch lines before punching, and examine the seam before finishing the edges. Catching a misplaced mark early is simpler than finding it after later steps depend on its position.
Use a short checkpoint list suited to the project instead of relying on memory. For a hand-sewn item, the list might prompt you to confirm that the panels align, the holes follow the intended line, and the thread sits consistently. Leatherworking tools can support careful marking and inspection, while the checklist keeps those checks in a repeatable order.
Separate observation from judgment in your notes. “The corners don’t match” is more useful than “I’m bad at cutting,” because it describes something you can examine. Write down the change needed and why, such as adjusting the pattern position because one panel extends beyond the other. Specific notes make the next revision purposeful.
When a draft is part of the craft, use the same method on the page. On Day 5, evaluate the draft and write down the needed changes and their reasons. On Day 6, rewrite it using those observations. For a physical project, the equivalent is to assess a sample, record the correction, and apply it to the next attempt.
Feedback can reveal a flaw you’ve stopped noticing. Ask someone to assess one defined feature, such as whether a box lid sits evenly or a knitted edge lies flat. Compare their observation with your notes, then choose one test that could address the issue. Treat feedback as information about the work, not a verdict on your ability.
Close each project with a brief review: name one result that met your standard, one weakness to address, and the next practice task. For example, if a painted line varies in width, practice controlling the brush on scrap before the next finished piece. This record gives your improvement a clear starting point.
5. Studying expert work
A finished object shows what an experienced maker achieved, but close observation can reveal how its qualities work together. Choose an example, such as a dovetail drawer or a hand-thrown vase, and study its construction, proportions, and finish. Look beyond the overall impression to notice the small decisions that make the piece feel resolved.
Start with a specific question. In a dovetail drawer, examine how the pins and tails meet, whether the corners sit flush, and how the grain runs across the front. In a vase, look at how the rim, shoulder, and base relate. A focused question turns admiration into useful analysis.
Separate what you can observe from what you’re guessing about the maker’s process. You can see a smooth curve on a carved spoon, but a photograph may not reveal which tool created it. Record visible details first, then choose an exercise to develop the relevant skill, such as carving a matching curve in scrap wood.
Study several examples, not just one celebrated piece. Compare how different potters shape handles or how furniture makers finish tabletop edges. Note which features recur and which reflect personal style. Repeated features can point to fundamentals worth learning; differences show where individual makers’ choices begin.
Break a model into qualities you can test. For a watercolor study, observe the value shifts, edges, and color relationships before painting a small passage yourself. For a woven basket, inspect the weave’s rhythm and how its rim is secured. Keep the exercise narrow, so you practice a technique rather than copy an entire work.
Then compare your study with the reference. Place the images side by side, or set your sample beside the original object. Look for one observable difference, such as a flatter curve or a heavier line, and use it to choose your next exercise. This gives expert examples a practical role in your learning.
Respect context when studying another maker. A technique that works for a delicate paper lantern may not suit a sturdy storage basket. Consider the object’s purpose, materials, and structure before adapting a detail. Borrow the principle, such as balancing lightness with support, then find a method suited to your own project.
Keep a small reference journal with a sketch, a short description, and one practice question for each example. A note such as “the bowl’s foot visually balances its wide rim” gives you a concrete idea to test. Over time, these observations help you recognize useful principles across projects without losing your own design judgment.
If organizing materials helps you prepare a focused study, craft bundles offer one option to consider for your project setup.
Hab-To Leather House: Crafting Bundles
Hab-To Leather House offers crafting bundles for leatherworkers who want suitable materials and tools together for a project. They can be a useful starting point for a repeatable practice piece, such as a cardholder or small pouch, so you can focus on developing your technique. Explore leathercraft bundles, vegetable-tanned leather, hardware, and leatherworking tools for your work. Choose materials and tools suited to the project and the skills you want to practice. A consistent process starts with thoughtful preparation, then grows through careful making and review. To discuss your leathercraft needs, contact Hab-To Leather House.
Carry Your Craft Forward
Let your next project be a place to apply one lesson and discover what you want to develop next. Choose a piece that feels worthwhile, prepare with care, and give your process room to evolve. Progress comes from making considered choices, then returning to the work with fresh attention.
For leathercraft, Hab-To Leather House’s crafting bundles offer a project-focused starting point. Explore crafting bundles for your next leather project, and choose materials and tools that fit the work you want to make.
- Building a focused practice routine
- Setting standards without chasing perfection
- Learning from expert makers
Every piece can teach you something useful. Keep making, stay curious, and let your craft grow through the choices you make next.
Frequently Asked Questions
Why practice in this way?
Structured practice helps you carry a reliable technique into a more demanding project. A small test piece lets you learn how a material responds before the result matters to the finished work. For example, test a finish on scrap before applying it to a bag panel. This builds familiarity with the process and helps you make deliberate choices as the project grows more complex.
What daily or weekly practice routine helps build consistent craft skills?
Use a simple rhythm: begin a session by choosing one technique, spend the session applying it, and finish by noting what you want to try next. Alternate focused exercises with a small project that brings those skills together. A leatherworker might practice making clean cuts, then apply that control to a small strap. Keep the routine manageable so you can return to it regularly.
How should you balance consistency with creativity and experimentation?
Keep the parts that protect a project’s function steady, and experiment with choices that affect its character. For a leather journal cover, preserve the dimensions and secure stitching while testing a new surface pattern on a sample. Record which version you prefer and why. This gives creative ideas room to develop without making the whole process unpredictable or risking an important finished piece.
What common mistakes make craft results inconsistent, and how can you avoid them?
Rushing preparation, switching methods mid-project, or ignoring material-specific instructions can lead to uneven results. Paint, glue, and finishes may need suitable application and setting conditions before the next step. Read product directions, prepare the work surface, and avoid handling a piece before its materials are ready. Leave enough time for each stage instead of forcing the process into a rushed session.
Disclaimer
All our blog articles are made for information purposes only we dont take responsability for any content from third parties.