



Solid Brass Leather Hardware for Buckles, Snaps and Sizing
A damaged buckle doesn’t always mean the whole leather strap is finished. You can replace solid brass leather hardware and preserve the rest of the item when the leather and attachment are sound. Some fasteners, such as Chicago screws, make repairs easier because they let you remove and refit parts. Choose a replacement based on the existing attachment, the leather’s condition, and the fitting’s size.
It’s frustrating when a buckle, snap, or strap fitting fails while the leather is still sound. This guide explains when repair makes sense and when replacement is the better option. Learn how to match hardware to leather width and thickness, what brass’s corrosion resistance means in practice, and how to choose fittings for your project. Before removing an old part, check how it is attached and whether the leather around it can support a replacement.
Key Takeaways
- Decide whether to repair or replace a fitting by looking at its condition and how it attaches to the leather.
- Match buckle and fastener size to the leather’s width and thickness, and measure before choosing hardware.
- Compare brass and stainless steel with the project’s exposure to moisture, expected use, and desired finish in mind.
- Choose a hardware finish that works with the leather’s colour and the overall look you want.
- Explore leather hardware, tools, and vegetable-tanned leather for materials suited to your next project.
Buckles and belt buckles
A buckle has to suit both the strap and its job. For a belt, the buckle’s bar and frame hold the strap in position, while the pin passes through a punched hole. A halter buckle serves a different arrangement, so its shape and attachment points matter. The Old #121 Brass Halter Buckle is made of solid brass. The Round Heel Bar Buckle is also described as solid brass, while the Brass Roller Strap Buckle lists solid brass among its materials. These examples show why a product name alone doesn’t settle the material question. Read the material description, then consider the buckle’s construction and fit.
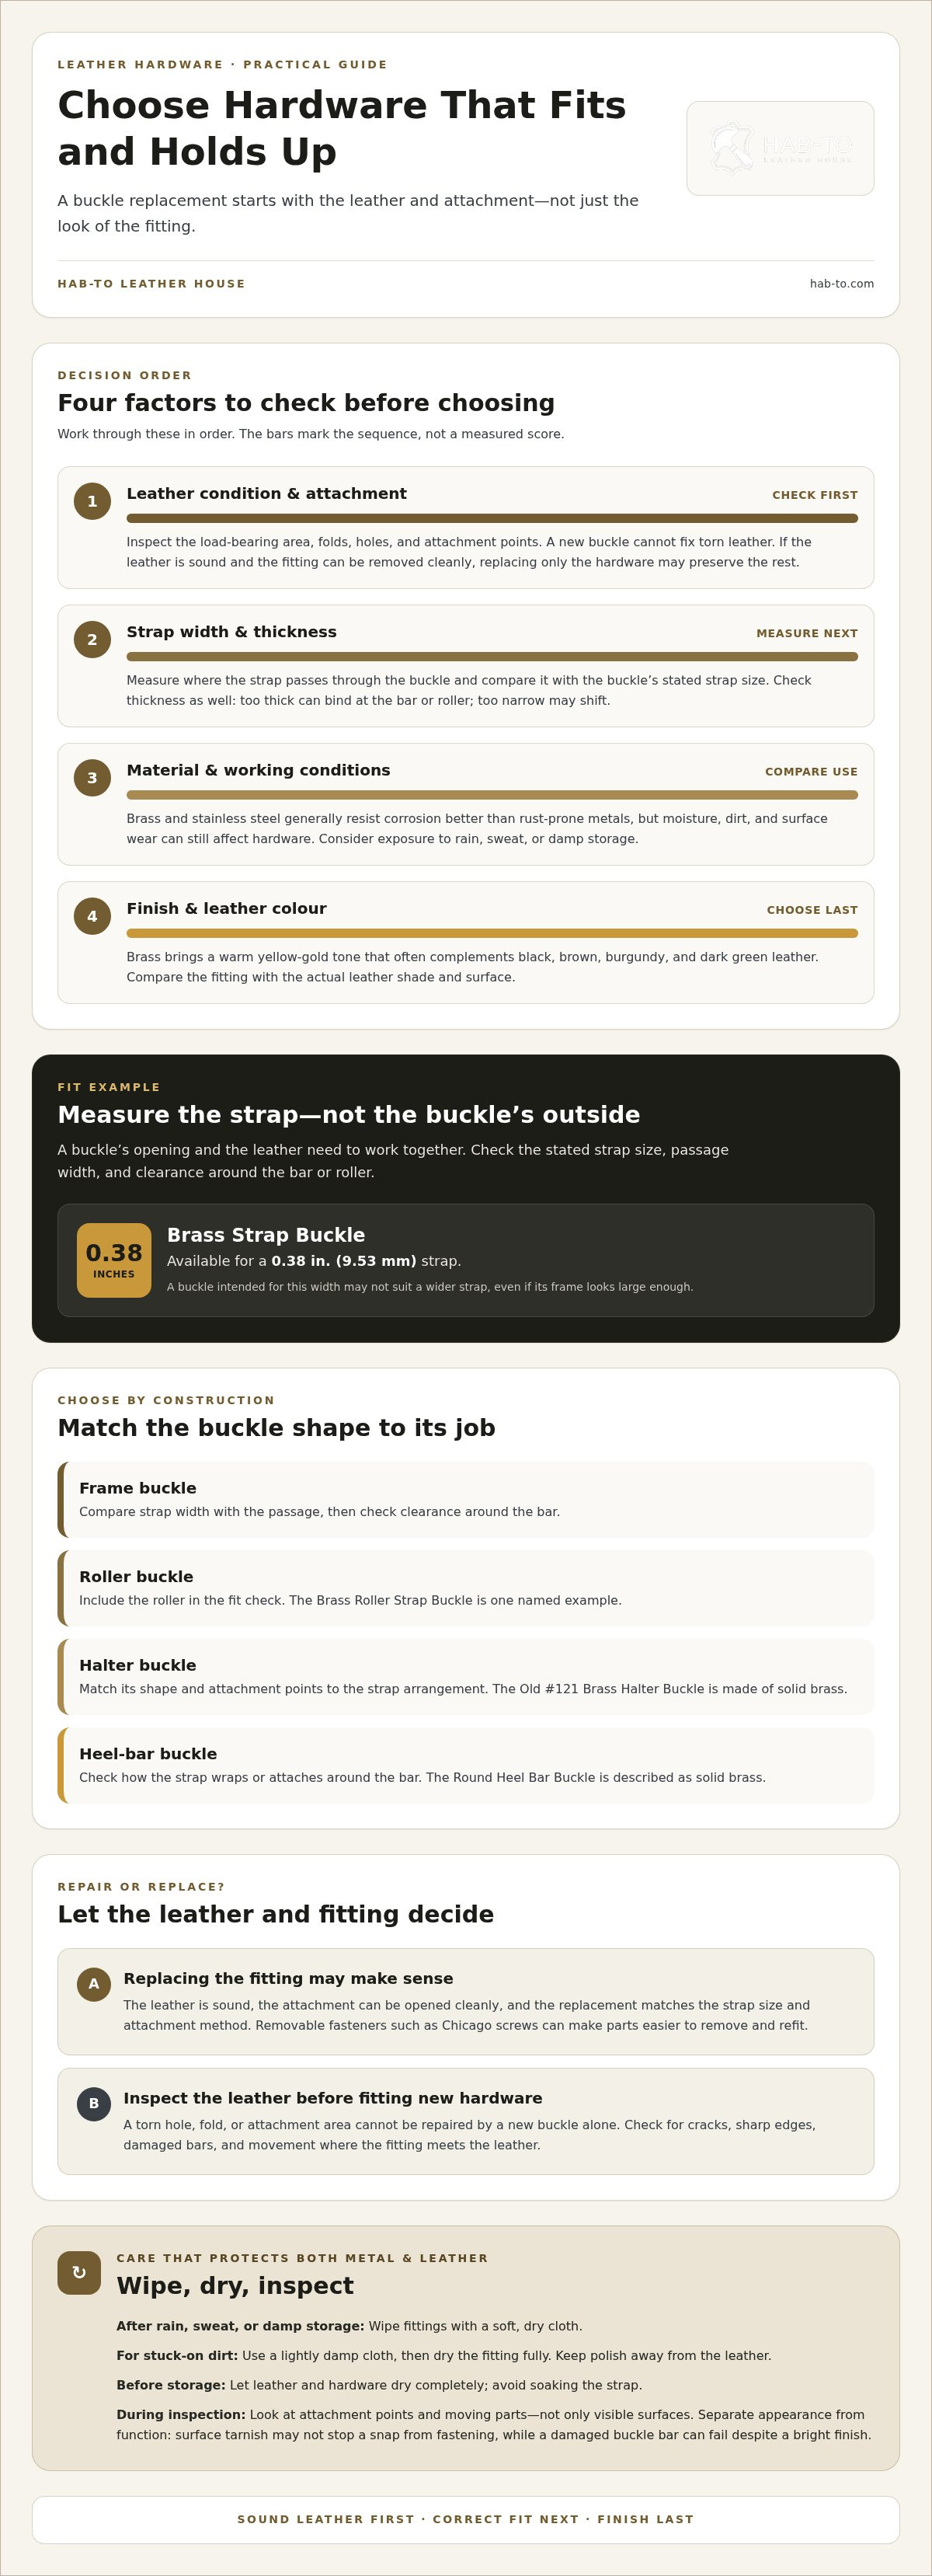
Start with the strap, not the buckle’s outside dimensions. Measure the strap width where it passes through the buckle. Then compare that measurement with the buckle’s stated strap size. For example, the Brass Strap Buckle is available for a 0.38 in. (9.53 mm) strap. A buckle intended for that width may not suit a wider strap, even if its frame looks large enough. Check thickness too: a strap that is too thick can bind at the bar or roller. A strap that is too narrow may shift instead of sitting securely. Fit depends on the opening and the leather together.
- Frame buckle: Compare the strap width with the buckle’s passage, then check clearance around the bar.
- Roller buckle: Include the roller in your fit check. The Brass Roller Strap Buckle is one named example.
- Halter buckle: Match the buckle’s shape to the strap arrangement. The Old #121 Brass Halter Buckle offers a specific reference.
- Heel-bar buckle: Check how the strap wraps or attaches around the bar. The Round Heel Bar Buckle is described as solid brass.
Before replacing a belt buckle, examine how it is attached. A stitched fold, riveted end, or removable bar calls for a different repair. Photograph the existing setup, note where the leather folds, and measure the strap at the buckle. If the leather is sound and you can open the attachment cleanly, replacing only the buckle may preserve the rest of the belt. If the hole, fold, or attachment area is torn, a new buckle won’t repair the leather. Base your decision on the condition of the strap’s load-bearing area and how the buckle is secured.
Solid brass leather hardware also shapes a project’s appearance. Brass typically has a warm yellow-gold colour, sometimes with subtle gray, green, or brown undertones. It often complements black, brown, burgundy, and dark green leather. Compare the fitting with the actual leather, since both its shade and surface affect the pairing. Match the strap width and attachment method first, then choose a finish that suits the look you want.
Corrosion resistance and rust
Brass and stainless steel generally resist corrosion better than rust-prone metals, making both useful for leather goods that get regular handling. Neither is maintenance-free: moisture, dirt, and surface wear can still affect hardware. A brass belt buckle, for example, can collect sweat and grime with daily use. Clean contact points before residue builds up, and consider how often rain or damp conditions reach fittings on outdoor equipment.
How do you clean and maintain solid brass leather hardware? Wipe it with a soft, dry cloth after use, especially around joints and strap slots. For stuck-on dirt, use a lightly damp cloth, then dry the fitting fully before storing the leather.
Does solid brass tarnish, and how can you prevent or remove tarnish? Yes, brass can tarnish when its surface reacts with air and moisture. Keep it dry, avoid prolonged damp exposure, and buff light tarnish with a soft cloth. Keep polish away from the leather.
Is brass hardware suitable for skin contact and everyday use? Solid brass fittings are used on everyday leather goods, including items worn against the skin. Keep contact surfaces clean and smooth, without residue. If a fitting develops a sharp edge or rough damage, stop using the item until the hardware is repaired or replaced.
Routine care starts with the fitting and the leather around it. Look for green or dark residue, rough patches, and loosened attachment points. These signs call for cleaning and closer inspection, not automatic replacement. A brass snap with surface tarnish may still fasten correctly, while a buckle with a damaged bar can fail despite a bright finish. Separate appearance from function: test moving parts gently and check for cracks, sharp edges, or movement where hardware meets leather.
- After exposure: Wipe fittings after rain, sweat, or damp storage.
- During cleaning: Use a soft cloth first; abrasive pads can scratch the surface.
- Before storage: Let the leather and hardware dry completely.
- During inspection: Examine attachment points and moving parts, not just visible surfaces.
Brass and stainless steel offer distinct looks and practical considerations. Brass brings a warm gold tone; stainless steel generally pairs well with black, gray, yellow, and blue leather. Match the finish to the project, then consider its working conditions. A fitting exposed to damp weather still needs drying and inspection. Care helps preserve solid brass leather hardware and the leather around its attachment. For a project requiring warm-toned fittings, compare the shapes and finishes in the leather hardware range.
Good maintenance protects the leather as well as the metal. Don’t soak a strap to clean its fittings, since moisture can affect the leather around rivets and folds. Wipe the hardware directly, dry the surrounding area, and inspect the attachment. Regular care helps keep solid brass leather hardware clean and working as intended on a belt, bag, or strap.
Snaps and fasteners
A snap gives a leather project a quick, repeatable closure. A halter snap connects a strap to a ring or fitting, while a press-stud fastens two leather layers directly. Choose the fastener for the job first. A removable connection suits adjustable or repairable designs. A fixed snap creates a neat closure, but replacement usually means removing and resetting its components. The Brass Halter Snap is available for strap sizes 0.75 in. (19.05 mm) and 1 in. (25.4 mm). Match the strap to the fitting before selecting it.
Consider how each fastener transfers force to the leather. A snap near an edge pulls against a small area, so leave enough leather around it to support repeated opening. On a bag flap, position the socket and stud where the flap closes naturally, without stretching the leather. For a detachable strap, choose a snap arrangement that connects securely to its ring or loop. Open and fasten the closure several times before finishing the project.
Installation depends on the fastener design. Mark the placement on the leather, confirm both parts align, then make the required opening with the appropriate tool. Set the components squarely, because a tilted post can interfere with closure. Use a setting tool suited to the hardware rather than striking the fitting directly. The leather snap-setting kit brings snap and rivet tools together for hands-on work. Test the finished snap before loading or wearing the piece.
- For a flap: Align the stud and socket before setting either component.
- For a strap: Match the stated strap size, then check the attachment point.
- For a repair: Inspect the leather around the old fastener for tearing or stretched holes.
- For a new setting: Keep the tool square and test the closure afterward.
Chicago screws are useful when a project needs removable hardware. Their threaded connection can make repairs easier: a strap fitting secured with a Chicago screw can come off without cutting through stitching. But not every fastener is interchangeable. The screw length, leather thickness, and fitting arrangement must work together. Check that the screw seats firmly and won’t protrude where it could catch or rub.
When replacing a failed snap, remove the old parts carefully and inspect the hole. If the surrounding leather has split, a new snap in the same spot may not hold securely. A sound repair may mean moving the fastener to intact leather or reinforcing the attachment area. For a Chicago screw, inspect both the threads and leather opening before reassembly. Match the replacement to the original function, strap size, and placement. A secure closure needs sound leather and correctly aligned parts.
Choosing hardware size
Fit begins with the leather component, not the fitting’s appearance. Measure the strap where it passes through a buckle, loop, or ring. Measure its thickness at that same point. Then compare both dimensions with the hardware opening and intended strap size. The Cast D-Rings are available for a 0.75 in. (19.05 mm) strap. That stated size gives a useful reference, but leather still needs room to pass through without bunching. A close fit can restrict movement. A loose fit can let the strap shift during use.
What you will need
- Ruler or measuring tape: Measure the leather’s width at the fitting point.
- Thickness gauge: Check the leather layers where they meet the hardware.
- Leather offcut: Test the fitting before cutting or punching the finished piece.
- Pencil and paper: Mark measurements and make a simple fitting template.
Measure consistently. Lay the leather flat without pulling it tight, measure across the width, then check thickness near the attachment. If the strap tapers, measure the section that will sit inside the fitting. A belt end, bag handle, and adjustable shoulder strap may all have different dimensions, so don’t assume one measurement applies throughout the project. Record each measurement beside its intended fitting, especially when the design combines buckles, rings, and keepers.
- Measure the leather: Record width and thickness at the fitting location.
- Identify the passage: Compare the strap width with the hardware’s usable opening.
- Check working clearance: Allow for folded or doubled leather where needed.
- Test the fit: Slide a matching leather offcut through the fitting before assembly.
Hardware can offer several size choices within one type. The Lexington Wrapped Bar Pull is available in 3 sizes, while the Lexington Leather Pull is available in 2 sizes. Match the specific fitting to the project, rather than choosing by name alone. For a handle, check how folded leather sits around the bar. For a strap, make sure the opening accommodates its full width and thickness.
Thickness matters at folds and attachment points. Leather folded around a buckle bar takes more space than a single layer. Test the folded section with a scrap from the same leather. For rivets or screws, account for every layer they pass through. A fitting that works on one layer may sit poorly on a doubled tab. Keep the layers flat and aligned during the test, since an uneven fold can make a suitable fitting seem too small.
Before cutting or punching, use a marked offcut as a mock-up. Check that the strap enters, moves, and exits the fitting without scraping its edges. Compare the leather with the fitting’s stated strap size, then test how the folded section sits. This can prevent misplaced cuts and holes. Choose hardware only after confirming that its size suits the specific leather component and construction.
Solid brass leather hardware
“Solid brass” describes the hardware’s material, not just its colour. A brass-coloured fitting may be made from a different metal, so read the material description before choosing. The Solid Brass Sam Browne Button Stud is one specific example. A button stud can secure a flap or strap; a buckle controls a belt or adjustable strap. Choose the fitting for the job before comparing appearances.
Solid brass hardware typically has a warm yellow-gold colour, sometimes with subtle gray, green, or brown undertones. That character suits visible fittings such as belt closures, bag tabs, and strap studs. Compare the hardware beside the leather under the lighting where the item will usually be seen. Brass often complements black, brown, burgundy, and dark green leather, but the best pairing depends on the leather’s shade and the look you want.
Choose materials for how the item will be used, not appearance alone. For daily handling, inspect the part that moves or bears against the leather. With a Sam Browne button stud, consider how its matching opening will engage the post. On a buckle, examine the bar and strap attachment. Stainless steel is generally stronger than brass and suits rugged applications such as shoes and saddlery. That can guide demanding projects, while brass offers a distinctive visual character.
Before selecting a fitting, work through these checks:
- Identify the material: Distinguish solid brass from a brass-coloured finish.
- Match the function: Choose a stud for a fastening point, or a buckle for strap adjustment.
- Inspect the contact: Check where the fitting meets leather and where moving parts engage.
- Consider the use: Compare brass with stainless steel for rugged applications.
- Assess the appearance: View the fitting beside the actual leather, not from a colour description alone.
Construction matters during repairs, too. If a button stud loosens, inspect the leather opening and attachment before replacing the fitting. A new stud won’t fix a torn or stretched hole by itself. Align the replacement with the original closure so the flap or strap engages cleanly. For a new project, mark the fitting’s location and test the closure with an offcut before punching holes. This helps protect the finished leather from misplaced cuts.
The practical takeaway is straightforward: choose solid brass for its material and appearance, then judge each fitting by its task, attachment, and leather contact. A solid brass button stud serves a different purpose from a buckle. Select each component deliberately, and let the project’s working demands guide the final choice. To compare fitting types for your design, explore the leather hardware range.
Hab-To Leather House: Vegetable Tanned Leather
Hab-To Leather House is a natural next step when your hardware choice is clear and you’re planning the leather project around it. Explore leather hardware alongside leather materials, then consider how the leather’s thickness and construction will work with your buckle, snap, or fastener. Leatherworking tools and crafting bundles can also support the making process, whether you’re starting a new piece or replacing a fitting on an existing one. Choose materials with the final project in mind, and keep your measurements close as you compare options. For leather and hardware for your next project, visit hab-to.com.
Put Your Hardware Choice to Work
Turn your hardware choice into a clear project plan before cutting leather. Sketch the fitting’s position, note the strap dimensions, and consider how the piece will be used. A small test with an offcut can show whether the design works before you commit to the finished piece. Careful preparation helps every buckle, snap, or fastener serve both function and form.
For that work, Hab-To Leather House offers vegetable-tanned leather, leather hardware, and leatherworking tools. These materials can help you develop a coordinated project, from selecting leather through fitting the hardware. Choose the parts with the finished use in mind, then build carefully and let the craft show. The right solid brass leather hardware is one considered choice within the larger design. Browse gold-tone hardware as you plan the details of your next project.
Take your time, trust your measurements, and enjoy bringing your next leather project to life.
Frequently Asked Questions
Can leather hardware be replaced or repaired?
Yes, you can often replace an individual fitting and preserve the leather item. The attachment method and leather condition determine whether repair is practical. A fitting held with a screw, for example, may come off without disturbing nearby stitching. A riveted fitting usually requires removing the old rivet. Before reinstalling solid brass leather hardware, inspect the hole and surrounding leather for splits, stretching, or compressed fibres that could affect the new attachment.
How do I choose the right size leather hardware?
Measure the finished leather component where the fitting will sit, including any folded or layered sections. Compare that measurement with the hardware’s intended strap size or opening. For a bag handle, test the folded attachment with a scrap of the same leather. This shows whether the layers fit comfortably before you punch holes or set fasteners. Consider movement, too: a sliding strap needs more clearance than a fixed loop.
What hardware is best for leather bags and belts?
Choose hardware to suit the component’s function and construction. Belts typically need a buckle suited to the strap and closure; bags may need closures, handle fittings, rings, or strap connectors. A removable shoulder strap needs fittings that connect securely and allow practical detachment. For a small pouch, a simple press button may suit the flap better than a bulky buckle. Match each component to its load, movement, and visual role.
What hardware is commonly used in leathercraft projects?
Leathercraft projects often use buckles, rings, snap hooks, press buttons, studs, zippers, handles, and closures. Rivets and screws attach components, while stoppers can control or finish a strap. A journal cover might use a stud closure; a travel bag may combine zipper teeth with handle fittings. Sketch the connections before you start. This helps separate essential hardware from decorative pieces and keeps construction manageable.
What is the difference between solid brass and plated hardware?
Solid brass hardware is made from brass throughout, while plated hardware has a surface layer over another material. If plating wears through, the base metal can show. With solid brass, wear reveals brass beneath the surface as well. The difference matters when choosing a fitting for its appearance and how it may wear over time. Check the material description rather than relying on a gold colour, which doesn’t identify the metal underneath.
What is solid brass leather hardware?
Solid brass leather hardware means leather fittings made from brass throughout, rather than fittings with only a brass-coloured surface. Examples include buckles, snaps, studs, and rings for fastening or connecting leather components. The material’s warm tone can complement different designs. Choose a fitting for its purpose first, then consider its shape, attachment, and finish. A buckle and a stud serve different functions, even when both are made from brass.
How can you tell solid brass from brass-plated leather hardware?
Look for wording such as “solid brass” or “brass-plated” in the material description. A gold or yellow appearance alone doesn’t tell you what metal lies underneath. On worn plated hardware, a different base metal may show through at exposed edges, but that isn’t always easy to see. For a replacement, use the product’s material details as your main guide to finding a part that suits the existing item’s finish and function.
What types of solid brass hardware are used for leather goods?
Solid brass leather hardware includes functional fittings such as buckles, halter snaps, button studs, and rings. Buckles adjust or secure straps; snaps connect parts or create closures; studs engage with a matching opening. Rings provide attachment points for handles or straps. Select each type according to the project’s construction and how its components need to move. This keeps the hardware purposeful and avoids adding fittings that don’t serve the design.
Disclaimer
All our blog articles are made for information purposes only we dont take responsability for any content from third parties.