


How to Make Leather Goods Look Professional: The Artisan’s Secret Guide
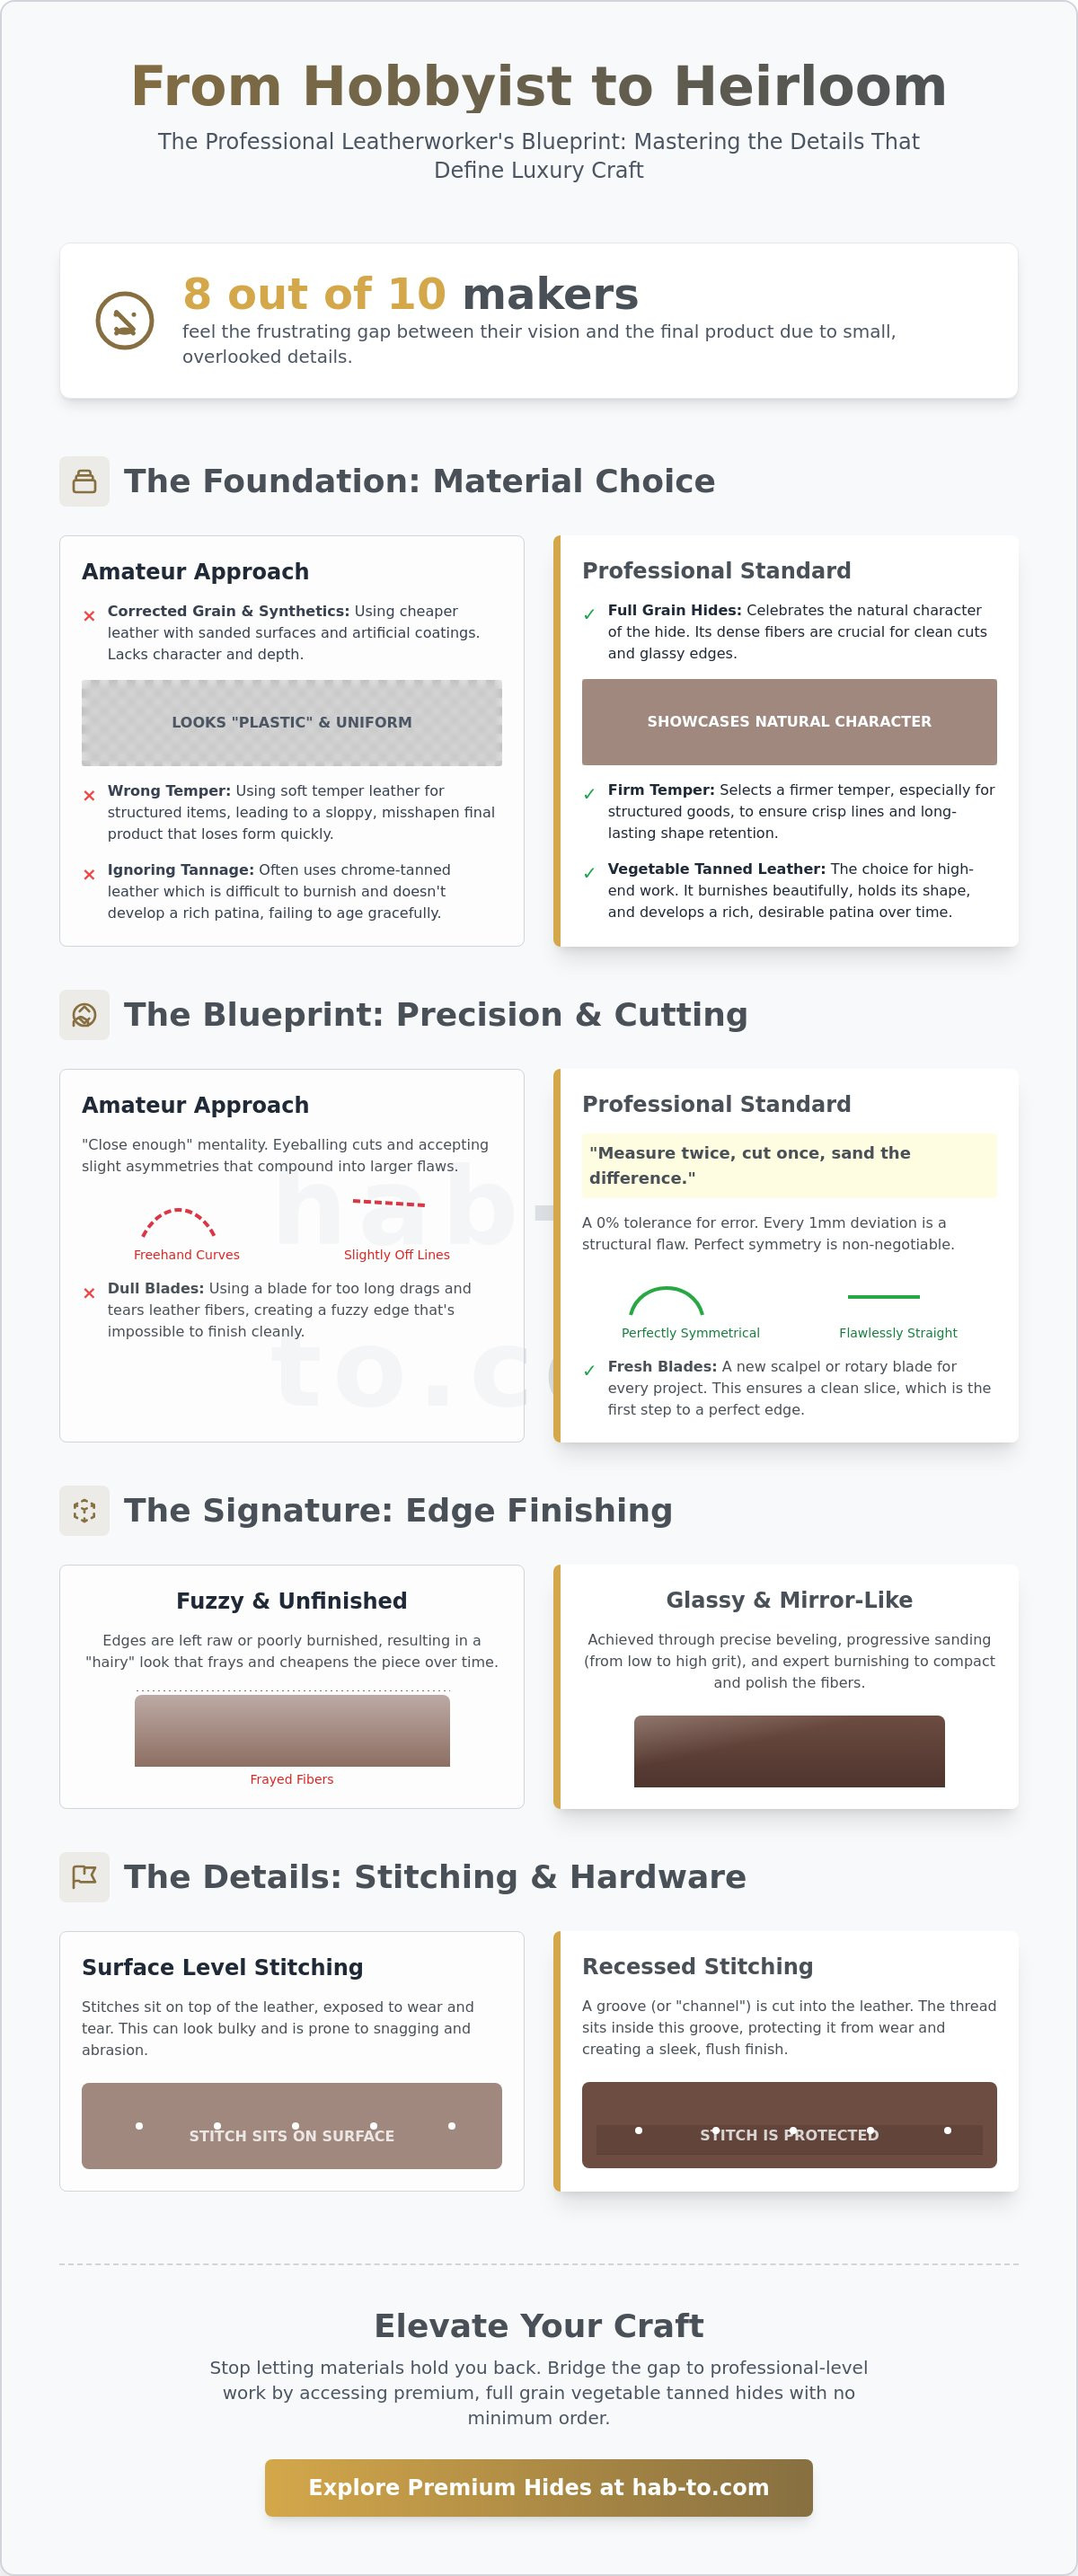
What if the difference between a "hobbyist" wallet and a luxury heirloom isn't talent, but simply the three millimeters of space at the very edge of your hide? It's frustrating to invest ten hours into a project only to see messy edges fuzz up after just two weeks of use. Eight out of ten makers feel that gap between their vision and the final product, especially when stitching looks inconsistent or the leather choice feels wrong for the specific design.
I understand that frustration because we've seen it throughout our 160 years of family experience in the leather trade. This guide reveals exactly how to make leather goods look professional by focusing on the technical secrets that separate amateurs from masters. You'll discover how to achieve a glassy, mirror-like edge finish and why recessed stitching is the hallmark of high-end craft. We're moving past the "homemade" look to embrace professional techniques and premium material choices that transform your work into something truly premium.
Key Takeaways
- Understand why the integrity of your material is the foundation of any high-end project and why skill alone cannot compensate for poor-quality leather.
- Learn the professional rule of "measure twice, cut once, sand the difference" to ensure every project achieves perfect, high-end symmetry.
- Master the specific techniques of beveling and progressive sanding to learn exactly how to make leather goods look professional with a glassy edge finish.
- Identify the subtle details in stitching and hardware that signal luxury to the trained eye and separate true artisans from hobbyists.
- Discover how to bridge the gap to professional-level work by accessing premium hides with no minimum order requirements.
The Foundation: Why Material Choice Dictates Professional Results
Professional leatherwork isn't just about straight stitches or sharp knives. It is the intersection of precision, material integrity, and refined finishing. If you're wondering how to make leather goods look professional, you have to start with the hide. You can't polish a bad foundation. Cheap, heavily processed leather will always look like a mass-produced item from a discount bin, no matter how many hours you spend on it. Real artisans know that the material does half the work. No synthetics. No compromises. Just quality materials for real craftsmanship.
Understanding "temper" is critical for any maker. Temper refers to the firmness or softness of the hide. A wallet made from leather with a soft temper will lose its shape within weeks, looking sloppy and amateur. For a crisp, high-end look, you need a firmer temper that supports the structure of the item. This is why many master makers choose vegetable tanned leather. It offers the rigidity needed for clean lines and high-end burnishing that isn't possible with softer, chemical-heavy alternatives. Mastering various Leather crafting techniques starts with selecting a hide that responds to your tools rather than fighting them.
To better understand this concept, watch this helpful video:
Full Grain vs. Corrected Grain: The Visual Difference
Corrected grain leather has been sanded down to remove imperfections and then coated with a thick layer of pigment or plastic. It looks uniform, but it also looks "fake" and cheapens the overall aesthetic of your work. It lacks the depth and soul of full grain leather. When you use full grain, you're showcasing the actual skin of the animal, including its natural character. Professional results require hides with consistent fiber density across the entire piece. Fiber density is the tightness of the collagen structures within the hide, and it's the single most important factor in achieving a glass-like edge during burnishing.
The Role of Tannage in Longevity and Patina
Chrome-tanned leather is common in the fashion industry for jackets, but it's often the wrong choice for structural goods like wallets or belts. It doesn't hold a crease well and refuses to burnish. For those aiming for the absolute peak of professional materials, Shell Cordovan stands alone. It's dense, non-porous, and develops a glow that other leathers can't touch. The way a piece ages is a dead giveaway of its quality. A professional good doesn't just look great on day one. It develops a rich patina over time, which is the ultimate hallmark of a high-end, vegetable-tanned product. If the leather doesn't age gracefully, it's not professional grade.
Precision Cutting and Marking: The Secret to Symmetry
Precision is where a hobbyist becomes an artisan. When you eye-ball a curve or freehand a straight line, the human brain detects the slight asymmetry immediately. It feels "off" even if the customer can't name the specific flaw. To master how to make leather goods look professional, you have to embrace the professional rule: measure twice, cut once, and sand the difference. This mindset separates luxury goods from craft fair projects.
A single 1mm deviation at the start of a project creates a snowball effect during assembly. If your front panel is slightly crooked, your gusset won't align. By the time you reach the final stitch, that tiny gap has grown into a structural misalignment that ruins the silhouette. Professional results require a 0% tolerance for "close enough."
The secret to these clean lines often lies in the blade. Mike always says that a dull knife is a leatherworker's greatest enemy. Professionals change scalpel or rotary blades at the start of every new project. A fresh edge slices through vegetable-tanned hides like butter, whereas a used blade drags the leather fibers. This dragging creates a "fuzzy" edge that is nearly impossible to burnish to a glassy finish. Understanding Fine Leatherworking Lingo helps you realize that "precision" is the foundation of every luxury piece.
Using Templates and Scratch Awls for Accuracy
Stop using pens to mark your leather. Ink bleeds, leaves thick lines, and looks amateur if even a speck remains visible. Use a scratch awl instead. It creates a crisp, microscopic indentation that guides your blade with 100% accuracy. While paper templates work for prototypes, they warp and wear down over time. Invest in acrylic templates for your core products. They stay rigid, don't shave off when your knife hits the edge, and allow you to see the grain underneath. Use heavy pattern weights to ensure nothing shifts during the cut.
The "Clicker" Look Without the Machine
You don't need a 5-ton clicker press to get factory-perfect edges. The key is maintaining a perfectly vertical 90-degree angle with your knife. Many beginners tilt their hands, creating a beveled edge that makes assembly difficult. A Japanese skiving knife made from Shirogami steel is the gold standard for this. Its flat grind allows for ultra-clean corner radii that look machine-stamped. Always use a high-quality self-healing cutting mat to protect your blade and provide consistent resistance. If you need the right gear to upgrade your bench, you can browse our hand-selected tools to find professional-grade equipment.
Mastering the Edge: Achieving the "Glassy" Finish
Professionalism in leatherwork is often defined by the quality of the edges. If you want to know how to make leather goods look professional, you have to master the "glassy" edge. A raw, fuzzy edge is a sign of a beginner. A mirror-smooth, compressed edge signals a master artisan who refuses to compromise on quality. This level of finish isn't achieved through a single product; it's a disciplined five-step process that demands patience and precision.
Beveling and Sanding: The Prep Work
The foundation of a great edge starts with beveling. This move removes the sharp 90-degree corner of the leather to prevent "mushrooming," which is when the edge flares out and loses its shape over time. Choosing the right tool is vital. For 3-4 oz (1.2-1.6mm) leather, use a #1 beveler. For heavier 8-10 oz (3.2-4.0mm) belt leather, reach for a #3. Once beveled, you must commit to a strict sanding progression. Skipping grit levels is a common mistake that leaves deep, visible scratches. Start with 220 grit to level the layers, then move to 400, 600, and finally 1000+ for a silk-like surface. You'll know you're ready to stop sanding when the edge develops a slight "tackiness" under your finger, indicating the fibers are fully compressed and ready for moisture.
To ensure your base techniques like cutting and stitching are equally refined, you can consult this leather crafting guide for foundational industry standards. Proper prep work ensures that the later stages of burnishing actually produce a shine rather than just highlighting flaws.
Burnishing Agents and Friction Techniques
The choice of burnishing agent depends on your leather type. Water is a traditional choice for vegetable-tanned leathers, but Tokonole has become the modern gold standard. It's a water-based synthetic wax that penetrates deep into the fibers without the mess of gum tragacanth. Apply a thin layer, wait 20 seconds, and use a hardwood slicker. The secret here is friction, not downward pressure. High-speed, light-pressure movements generate the heat necessary to melt the waxes and seal the fibers. If you press too hard, you risk "burning" or distorting the leather's edge.
For those seeking a high-fashion aesthetic, edge painting is an alternative to burnishing. To do this professionally, apply the paint in three thin layers rather than one thick coat. Use a heat-creaser set to 60 degrees Celsius to smooth the paint between coats. This is how to make leather goods look professional when working with chrome-tanned leathers that don't burnish naturally. Finally, always finish with the "canvas rub." Using a piece of raw denim or heavy canvas to vigorously buff the edge for 15 seconds creates a natural, high-gloss shine that looks sophisticated and organic, avoiding the cheap "plastic" look of low-quality finishes.
Stitching and Hardware: The Details That Scream Luxury
Stitching is the heartbeat of any leather project. It's the first thing a customer's eye tracks when they pick up a wallet or bag. If your spacing is off by even 0.5mm, the human brain registers it as "handmade" in a messy way rather than "artisan." Precision here is the fastest way to learn how to make leather goods look professional. While a sewing machine is efficient, true luxury goods often rely on the traditional saddle stitch. This technique uses two needles on a single thread that cross each other in every hole. Unlike a machine lockstitch, a saddle stitch won't unravel if one thread breaks. It creates a distinctive slanted look that machine work simply can't replicate.
Choosing the right thread weight is equally vital. A common mistake is using thread that's too thick for small items. For a slim cardholder, a 0.4mm or 0.6mm thread provides a refined, delicate finish. On a heavy-duty duffel bag, you'll want to move up to 0.8mm or 1.0mm to match the scale of the piece. Beyond the thread, you must invest in premium leather hardware. Cheap, zinc-based plated hardware feels light and will flake or chip within months. Professionals stick to solid brass or stainless steel. These materials have a weight that feels substantial in the hand and develops a beautiful patina over time, just like the leather itself.
Pricking Irons vs. Stitching Chisels
Most beginners start with stitching chisels that punch all the way through the leather. While functional, pros often prefer pricking irons. These tools only mark the spacing and the angle of the stitch. You then use a diamond awl to pierce the leather as you sew. This method prevents the "exit holes" on the back from looking blown out or messy. To keep your lines straight, always use a wing divider to scribe a faint guide line parallel to the edge. Once you finish sewing, use a smooth-faced hammer to gently tap down your stitches. This seats the thread into the leather, protecting it from wear and giving it that flat, high-end appearance found in luxury boutiques.
Hardware Installation and Finishing
Nothing ruins a professional aesthetic faster than a scratched rivet or a crooked snap. When you're setting hardware, use poly or wood mallets and specific setting tools to avoid marring the metal surface. Luxury handbags often feature "recessed" hardware, where the leather is skived thinner in the area where a buckle or plate sits. This allows the hardware to sit flush with the leather surface rather than looking like an afterthought bolted onto the top. It's a small detail that makes a massive difference in the final silhouette of your work.
Ready to upgrade your toolkit? Browse our selection of professional-grade leather and tools to start crafting with no compromises.
Elevate Your Craft with Hab-To: The Professional’s Toolkit
Transitioning from an amateur hobbyist to a professional artisan requires more than just practice. It demands a shift in mindset regarding your materials. At Hab-To, we act as the essential bridge for this journey. Mike brings over 160 years of family heritage and deep industry knowledge directly to your workbench. You don't have to be a high-volume factory to access world-class materials. Our "No Minimum Order" policy is designed specifically for makers who want to test premium hides like Buttero, Cordovan, or Pueblo without a massive upfront investment.
Understanding how to make leather goods look professional starts with seeking expert advice. Mike offers personal consultations to help you choose the exact leather for your specific design. Whether you're building a slim cardholder or a heavy duty travel bag, the right temper and thickness change everything. We believe in "No synthetics. No compromises." This philosophy ensures that every piece you create carries the weight and quality of a true heirloom.
Sourcing Professional Materials in Europe
We hand-select our hides from the most prestigious tanneries in Italy and France. These regions are the heart of global leather production, known for their strict quality standards and traditional tanning methods. Having a wholesaler who understands the physical craft is vital. We aren't just shifting boxes; we're curators of material. If you're in the Netherlands, we invite you to our Amsterdam showroom. There is no substitute for the tactile experience of feeling the grain and smelling the natural tannins before you start your next masterpiece.
Start Your Professional Journey Today
Success in leatherwork depends on the harmony between your hands and your supplies. If you want to know how to make leather goods look professional, follow this final checklist for your next project:
- Premium Leather: Use hand-selected, vegetable-tanned hides from reputable European tanneries.
- Precision Tools: Invest in sharp, professional-grade blades and pricking irons.
- Patience: Take the time for edge painting, burnishing, and consistent saddle stitching.
It's time to move beyond "good enough" and embrace the standards of a master artisan. Stop making compromises with subpar materials that fail to age well. Visit our shop to browse our curated collection of professional tools and leather. Let's build something that lasts for generations.
Elevate Your Craft From Hobbyist to Master
Achieving a luxury finish isn't about luck; it's about the deliberate choices you make at your workbench. You've learned that symmetry starts with precision cutting and that a glassy edge finish transforms a simple project into a high-end piece. Most importantly, you now understand that your foundation dictates your results. Using world-class hides from tanneries like Horween and Walpier ensures your work ages beautifully and stands up to daily use.
Mastering how to make leather goods look professional requires both patience and the right partnership. At Hab-To, we bring over 160 years of family leather expertise to your creative process. We don't believe in barriers, so we offer premium materials with no minimum order requirements for artisans. Whether you're crafting your first wallet or your fiftieth bag, we're here to provide the tools and advice you need to succeed.
Browse professional-grade leather and tools at Hab-To Leather House to find exactly what you need for your next masterpiece. Your craft deserves nothing less than the best. Keep pushing your skills and enjoy every stitch.
Frequently Asked Questions
How do I stop my leather edges from getting fuzzy after a few weeks?
You stop leather edges from getting fuzzy by sealing the fibers with a high quality burnishing agent like Tokonole and sanding with 800 grit sandpaper. Apply a thin layer of the agent and use a wooden slicker or a 100% cotton cloth to create heat through friction. This process collapses the loose fibers into a solid, smooth surface. For a truly professional finish, repeat this sanding and burnishing cycle 3 times until the edge feels as smooth as glass.
What is the best thread for making professional-looking wallets?
The best thread for professional wallets is a bonded nylon or braided polyester like Vinymo MBT #5 or 0.6mm Ritza Tiger thread. These threads are preferred because they don't fray over time and lie flat within the stitch groove. Choosing a 0.5mm thickness ensures the stitch doesn't overpower the leather. It's a critical detail in how to make leather goods look professional because it provides strength without creating a bulky, amateur appearance.
Do I really need expensive tools to make leather goods look professional?
You don't need a thousand dollar workshop to create high end items, but you do need 4 core quality tools. Invest in a sharp Japanese skiving knife, a steel wing divider, John James needles, and a sharp diamond awl. High end results come from 100 hours of deliberate practice rather than owning a 500 dollar machine. Focus on mastering your hand techniques with these basic, premium tools first.
Why does my saddle stitch look crooked on the back side of the leather?
Your back stitches look crooked because your stitching chisel or awl isn't hitting the leather at a perfectly consistent 90 degree angle. Even a 2 degree tilt causes the exit hole to drift away from the stitch line. Keep your workpiece at eye level in a stitching pony to monitor your angle. Ensure every needle pass follows the exact same sequence to maintain a uniform 45 degree slant on both sides of the piece.
How do I choose the right leather thickness for a professional bag?
Choose a 2.0mm (5oz) thickness for the main body of a professional bag and 1.2mm (3oz) for internal pockets or linings. Using leather that's too thin causes the bag to lose its structural shape after 6 months of regular use. For handles, laminate two layers of 1.8mm leather together to ensure they don't stretch. This specific combination of weights provides the durability and "heft" expected in premium leathercraft.
Can I make professional leather goods using chrome-tanned leather?
You can certainly make professional goods with chrome-tanned leather, though it requires different finishing techniques like edge painting or folding. While vegetable-tanned leather is often the artisan choice, 90% of luxury fashion houses use chrome-tanned skins for their handbags. The secret is selecting a premium tannery like Haas or D'Annonay to ensure the grain is tight and the leather doesn't feel plastic or synthetic.
How do I get my stitching holes perfectly straight every time?
Get perfectly straight holes by marking a guide line with a wing divider set exactly 3.5mm from the edge of your leather. This creates a physical track for your stitching irons to follow. When you're learning how to make leather goods look professional, always use a stitching pony to keep the leather vertical. This setup prevents the "creeping" effect that happens when you punch holes on a flat, horizontal mat.
What is the difference between edge burnishing and edge painting?
Edge burnishing uses friction and a binder like Tokonole to fuse fibers together on vegetable-tanned leather, while edge painting uses an acrylic polymer to cover the edge. Painting is necessary for chrome-tanned leathers that don't have the tannins required to burnish. Both methods look professional if you sand with 400 grit paper between each of the 3 layers to achieve a perfectly smooth, rounded profile.
